Here's one of my favorite wood projects...
This is one of my favorite wood projects. This project was inspired by my girlfriend, Julie. When she first moved into my home, I had 2 roommates. So room was a real problem. Like most women, Julie had a ton of clothes, but I had no room for them. The solution was to build a bed with a large drawer. This particular design created 20 cubic feet of storage area.
This project started off like most, at the drawing board. One of the problems that had to be overcome was there was no room on either side of the bed, but about 8' of room at the foot of the bed. I already had a queen-size mattress (that fit perfectly in my room and suited my sleeping needs), so obviously I was going to have to build the bed to suit. Because of room limitations, side-opening drawers were out of the question. The solution had to be one, large drawer that opened at the foot of the bed. This meant that the drawer was going to be a very large one, which presented another problem: A drawer of this size, full of clothes, was going to weigh over 200 lbs. I would have to come up with a friction-reducing solution that would not only facilitate easy opening and closing of this massive drawer, but it would have to be sturdy AND cheap. I hunted and hunted for drawer sliders that could accomodate such a beast. I had no luck and ran into dead-ends everywhere. I even looked into having sliders custom made. The cost for such a venture was in the stratosphere. That wasn't going to do. I don't like expensive. I wanted to build this bed for under $200.00. Custom-made sliders from a third-party vendor would cost more than that! Obviously I was going to have to build them myself.
Since I seem to be partial to Roller-Blade wheels (because they're cheap, sturdy, and readily available), I figured I would incorporate them into my design. What I came up with has worked well for the past year. I imagine it will continue to work well for years to come.
I hope you enjoy reading about this project and looking at the pictures as much as I enjoyed building it. Total time on this project was a little under 3 days.
How does one build a bed???
I knew I had to build a bed that would fit my queen-size mattress. At first I thought I would build the frame and then build the drawer to fit inside, but on second thought I decided that it would be easier to build the drawer and then build the frame around the drawer. I had the thing fully designed in my head, and I basically knew what the roller assembly was going to look like, and what hardware I was going to use to build it. After calculating measurments, I built the drawer.
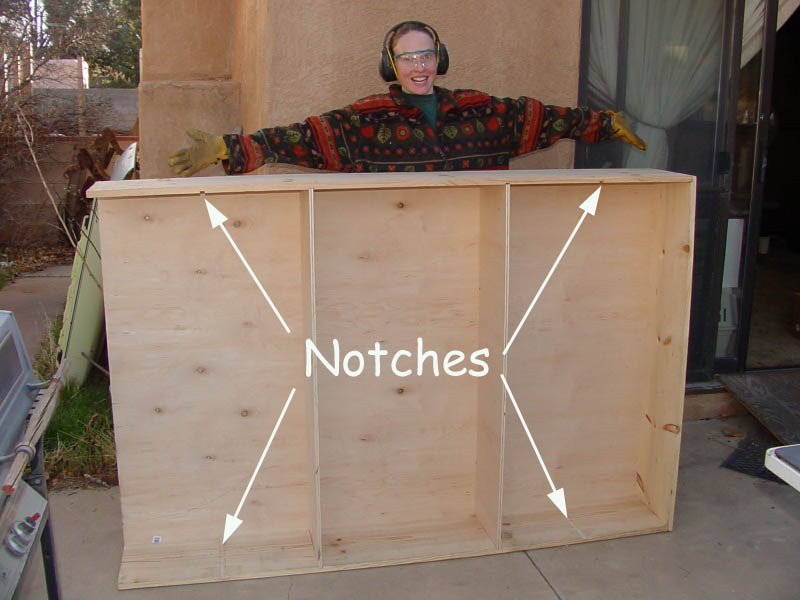
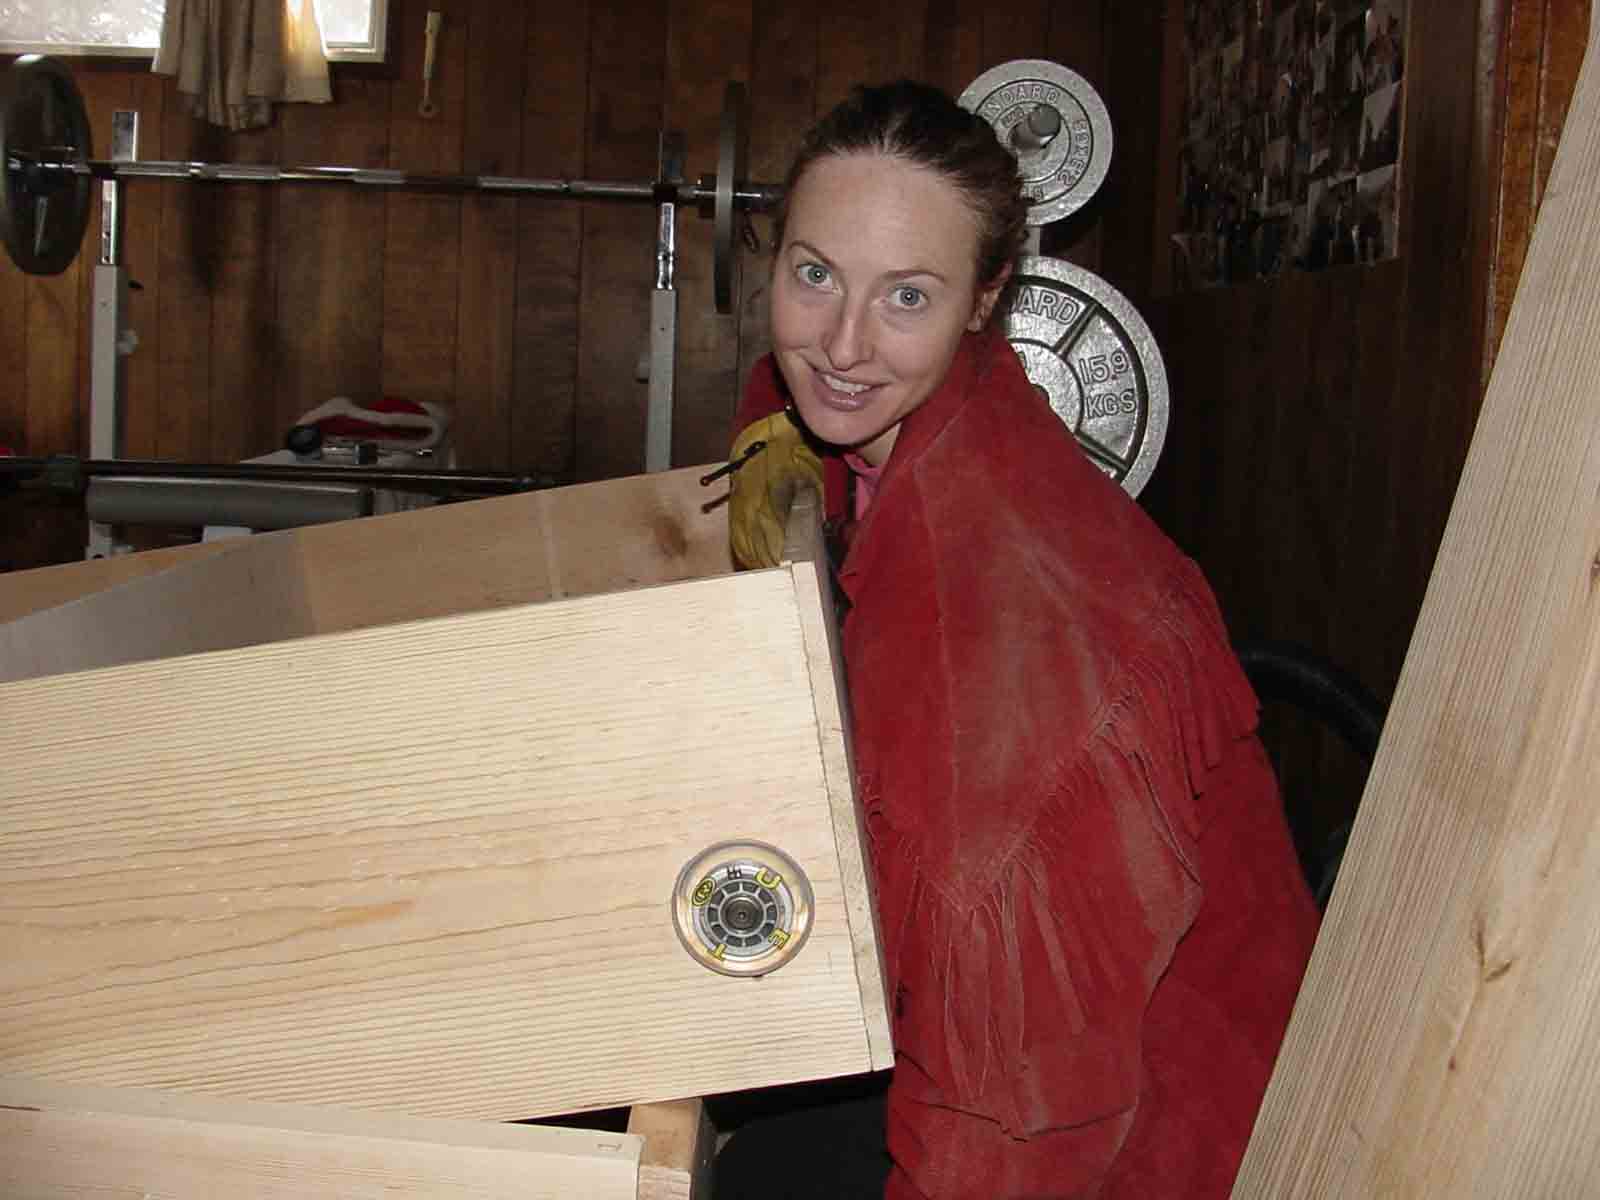
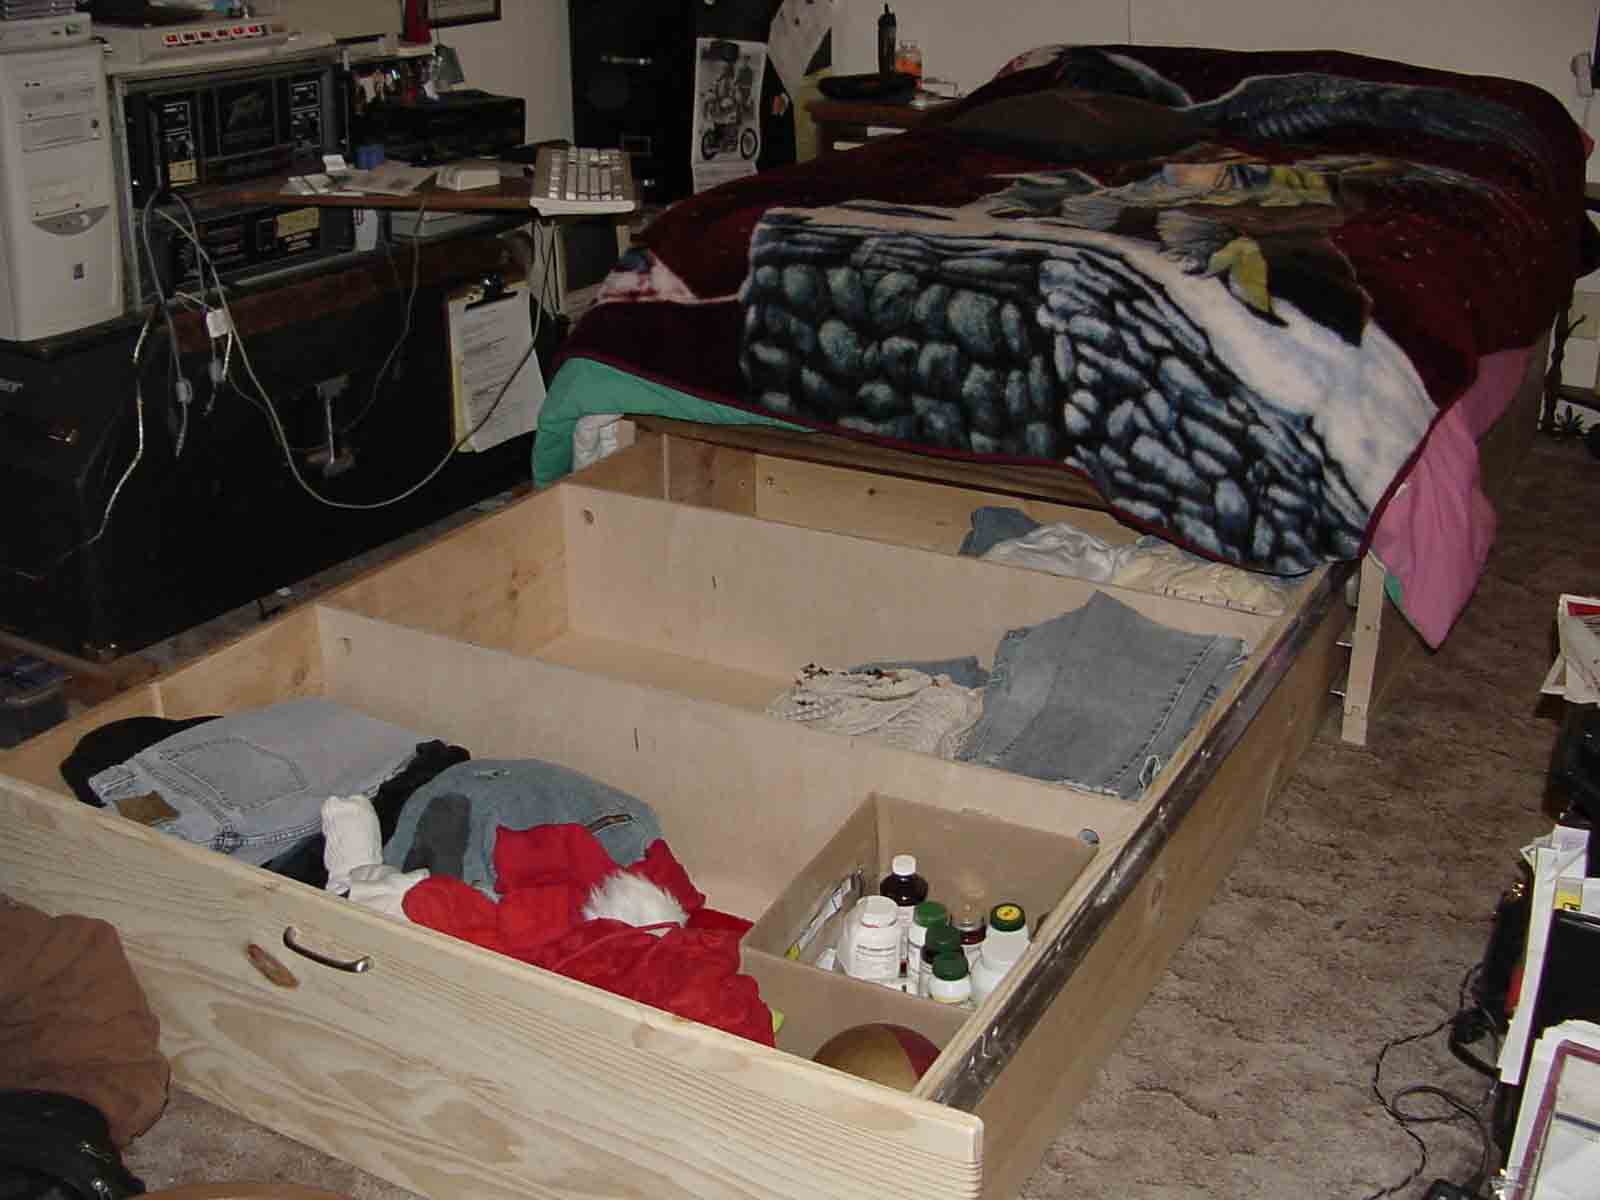
Here's a picture of Julie standing next to an almost completed drawer. Notice the notches at the top and bottom? I made the partitions removable by notching the inner walls of the drawer. The partitions simply slide in and out of these notches. Additional notches make the partitions modular. One can relocate the partitions as desired, or add some if need be. Since the partitions are simple rectangular sections of plywood, making additional ones will be a piece-o-cake. As you can see the drawer already has 2 partitions installed. So far we haven't had the need for additional partitions.
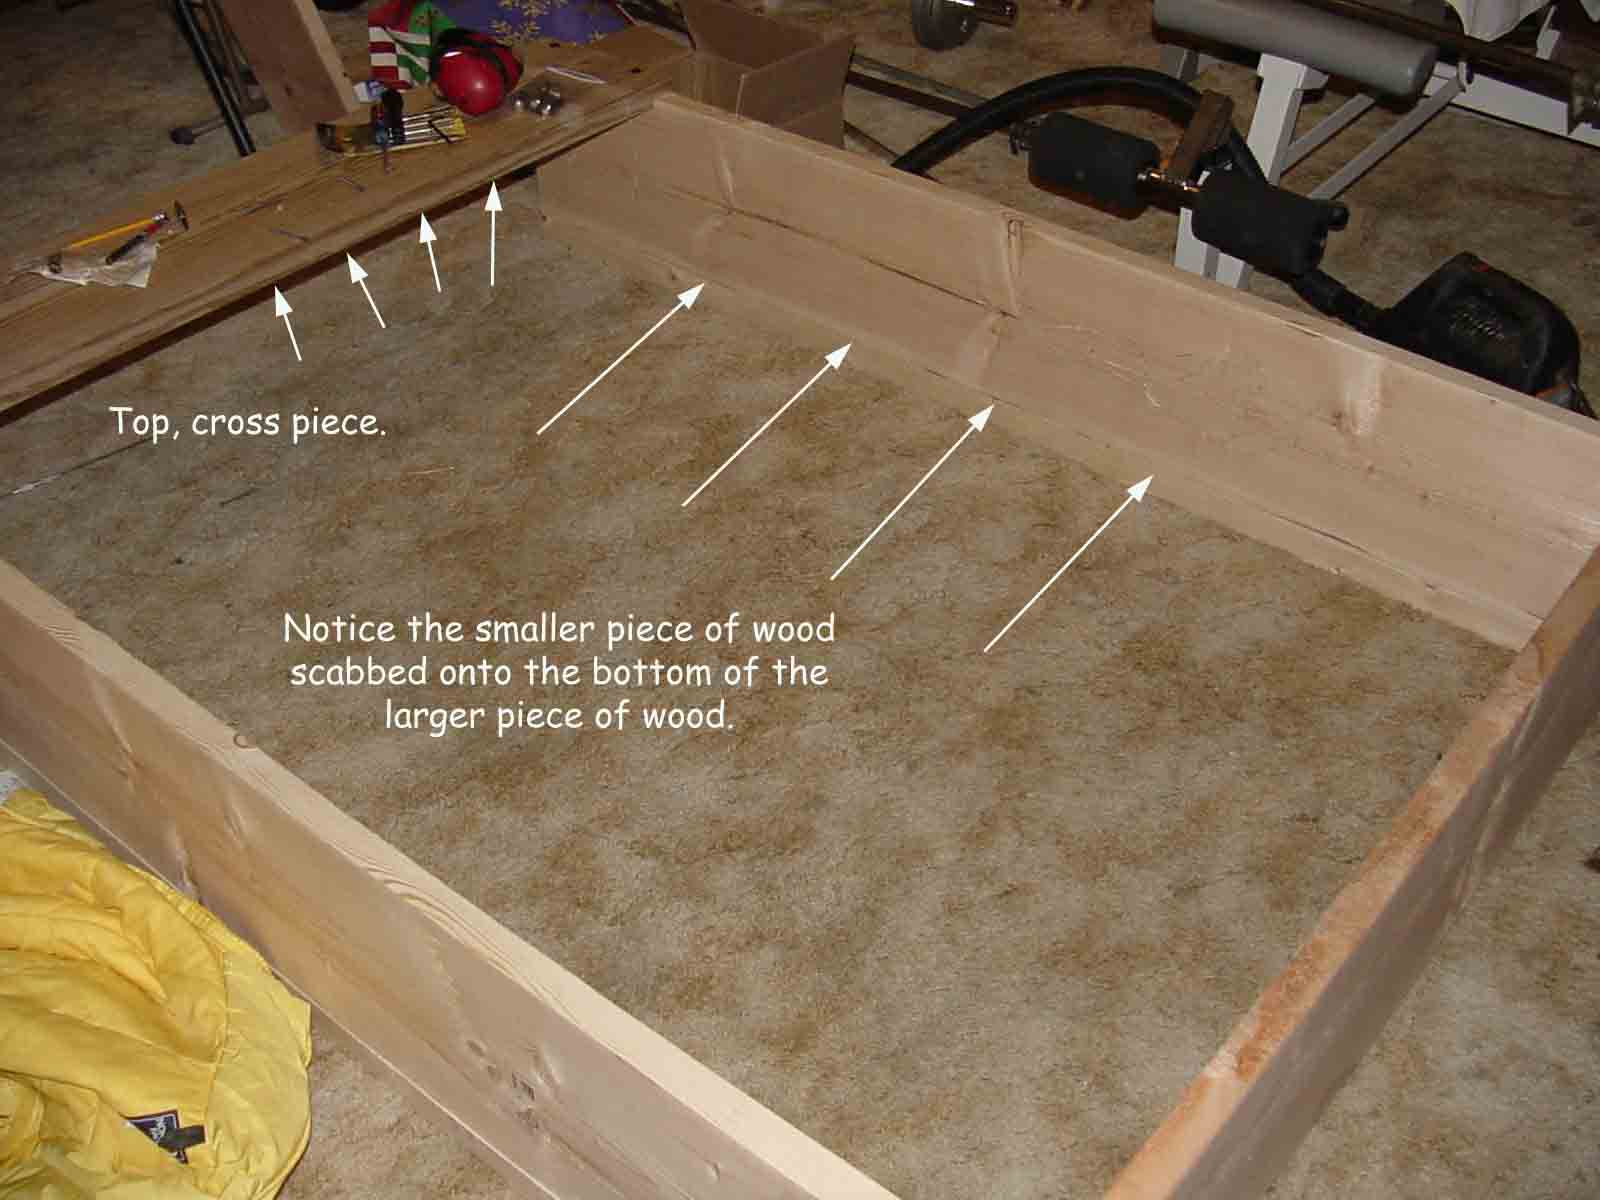
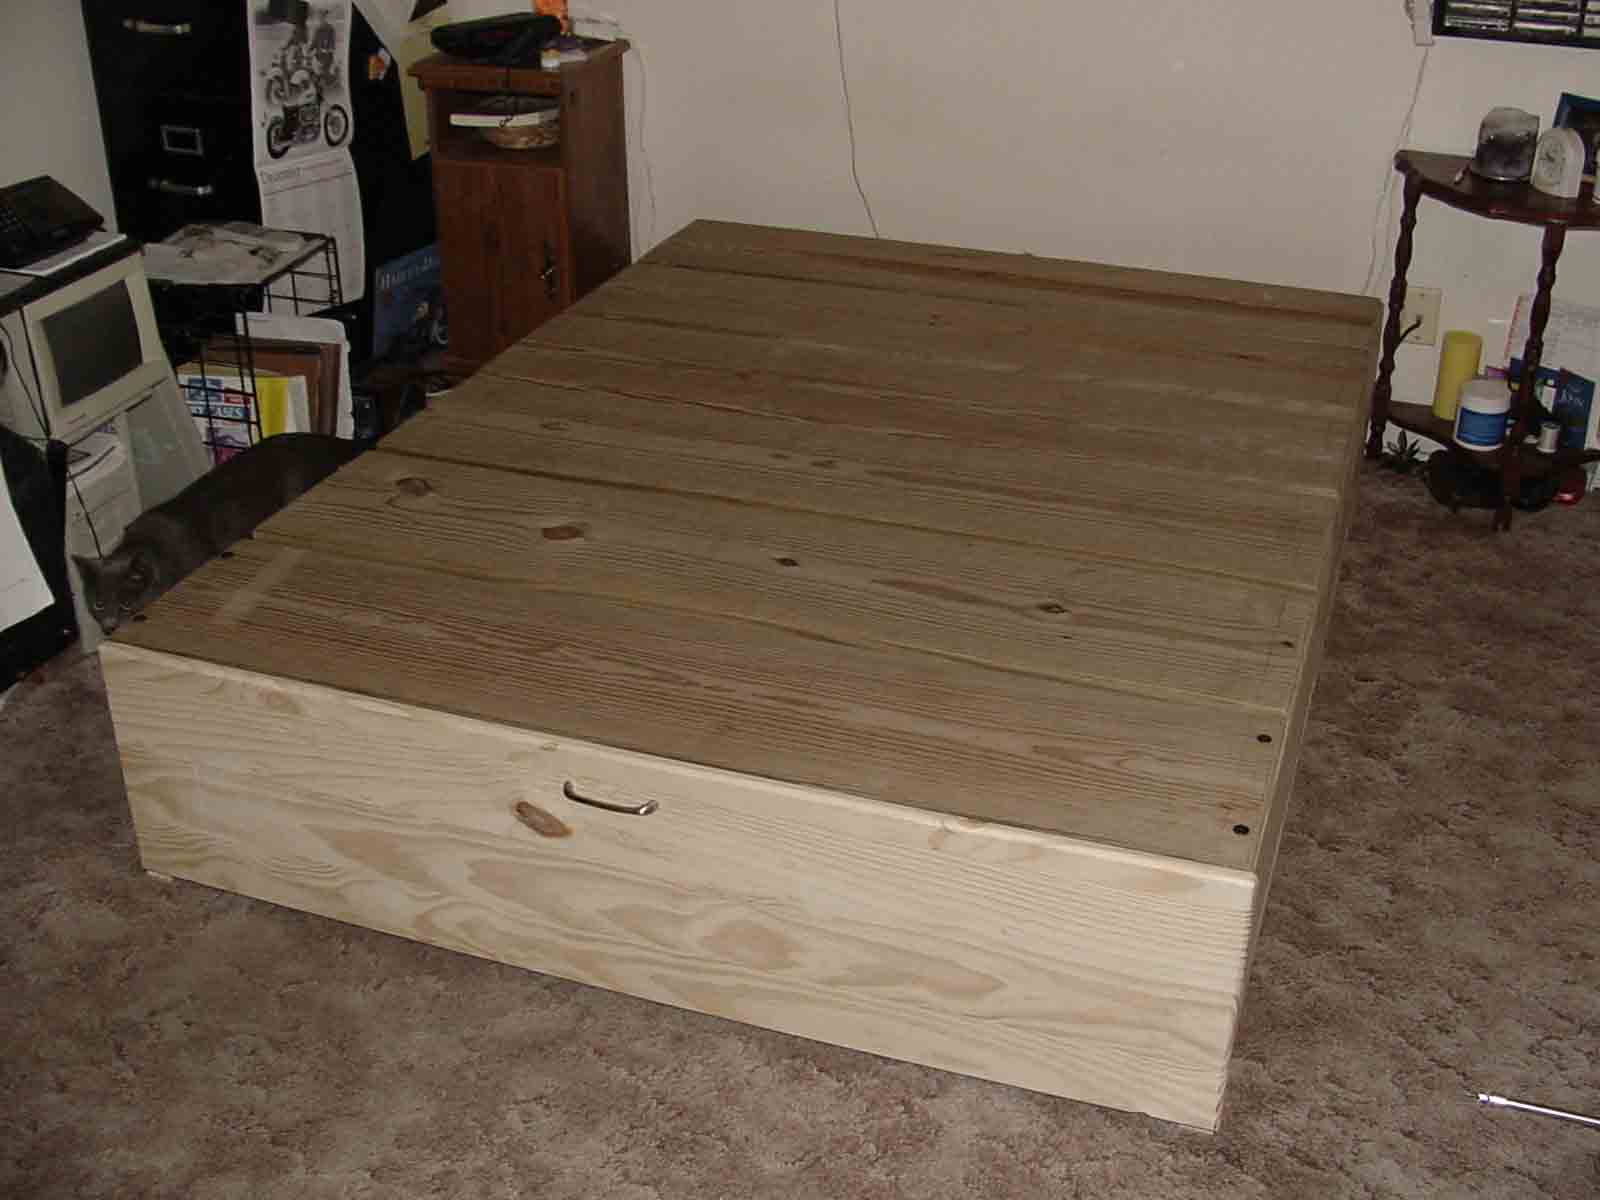
Please take note that the frame is made of 2" thick planks. I wanted the bed to not only maintain its original height of 14", but I also wanted it to be shock-load rated at 2,000 lbs...<;^) Since the top cross planks were going to be roughly 1" thick after notching them, all I needed was 13" worth of vertical lift. One would think that this wouldn't be a big deal, but one would be wrong. Not only is it near impossible to find 13"x 2" planks, but even if you could, the wood industry protocol is to lie about the wood they sell. You would actually need to purchase 14"x 2" planks to achieve 13" of vertical lift. For some weird reason all this lying seems to be okay with the government. My only guess is that, unregulated, the wood industry has been allowed to go awry. They have been allowed to "fudge" numbers to such a point of inaccuracy that, eventually, their measurements have become an out and out lie. What a crock of shit. Shame, shame, shame on the wood industry! I wonder what would happen if the Milk industry tried to sell a 54 oz. "gallon" of milk. The FDA would be all over them like depreciation on a ricer. But I digress...
Unfortunately for me, it was only after I got home did I discover that the "2x 12's" I paid for were actually 1 3/4" x 11". It never occured to me to measure. Yes, a true rip-off. So to make up for the wood industry's "estimate" of what they think 12 inches is, I used tongue-and-groove technology to marry 2 boards together to make one thick board. This can be seen in the picture below, and the picture to the right.
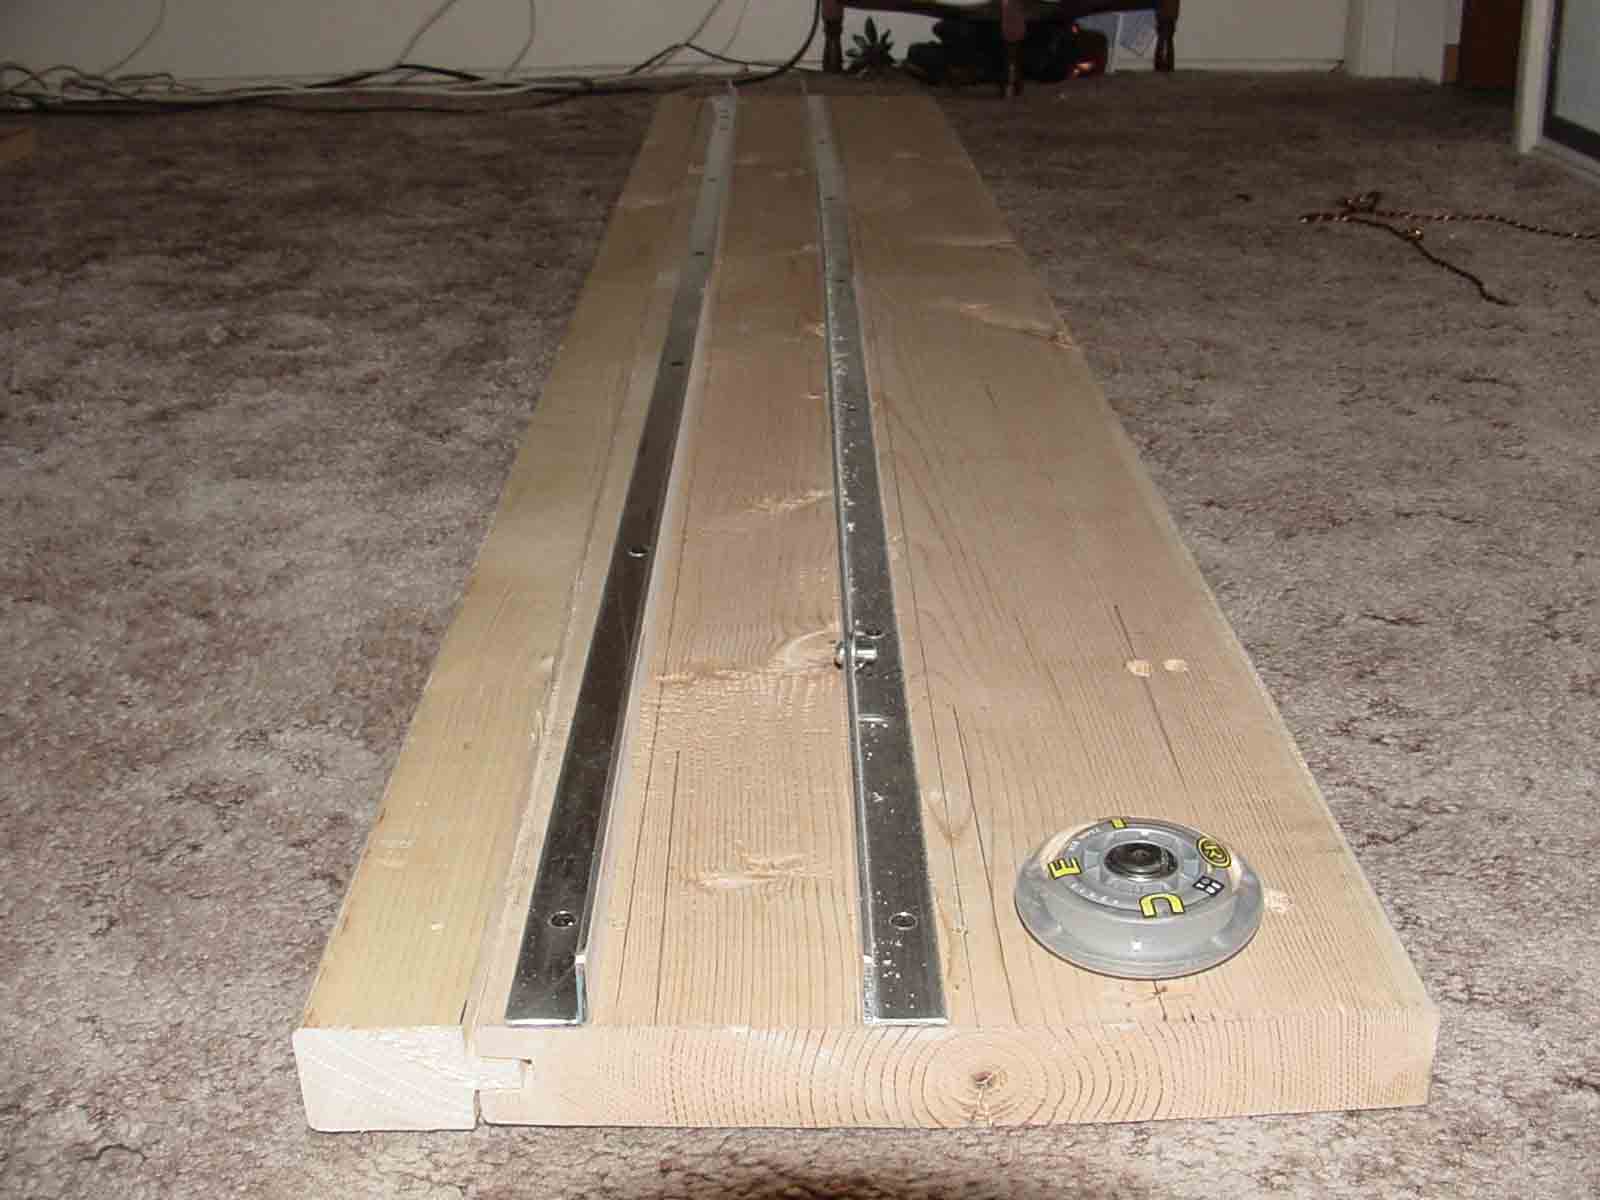
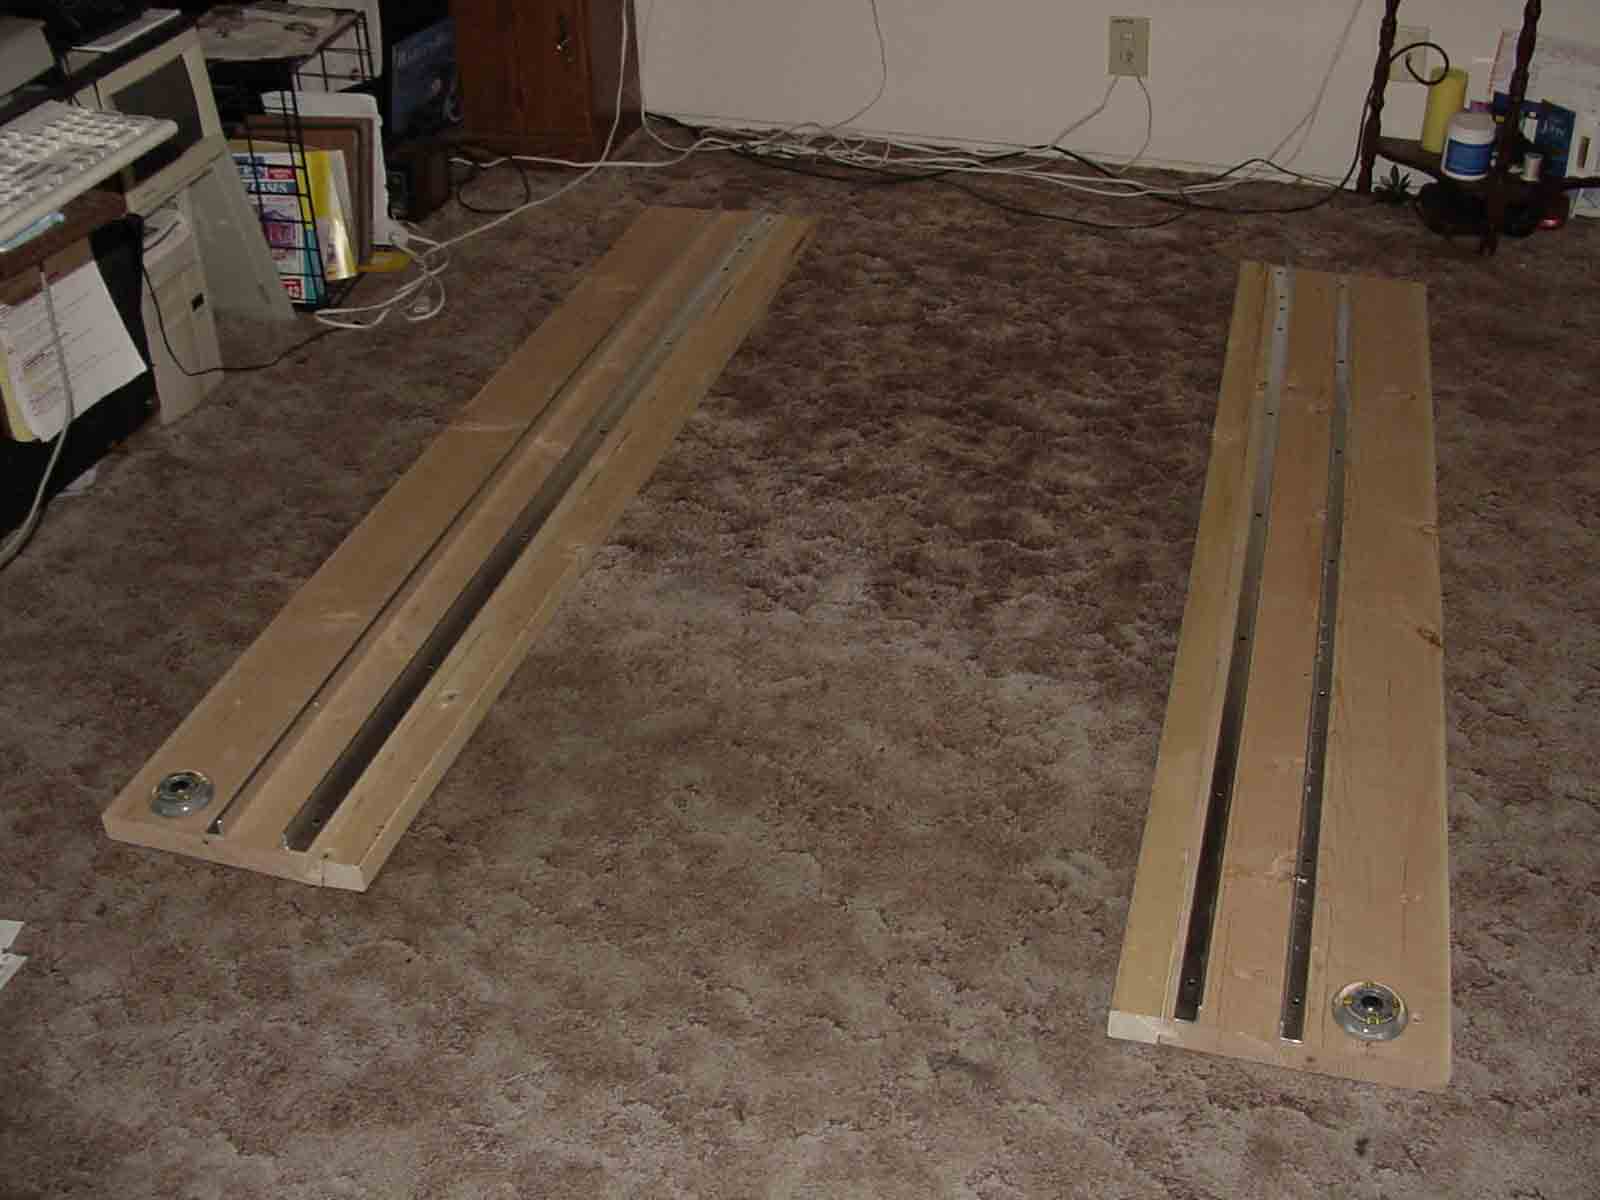
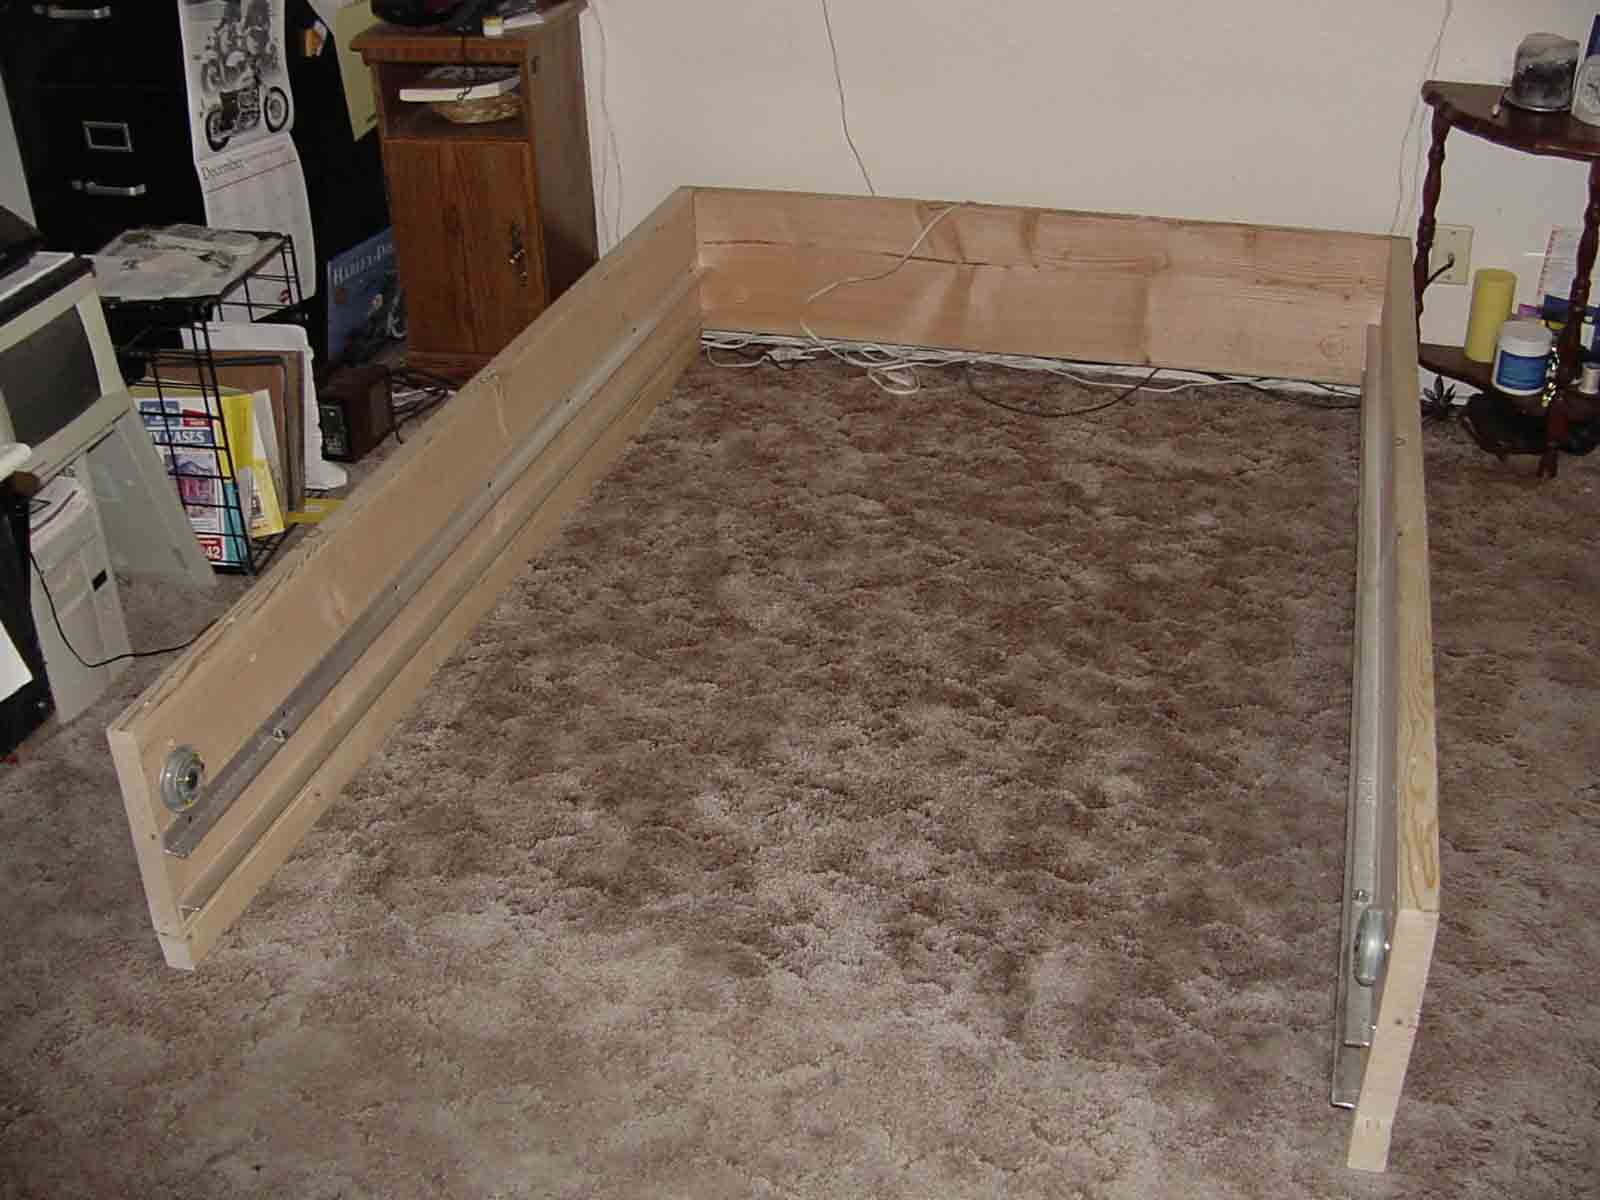
I started off with ordinary roller-blade wheels and then added aluminum tracks to the frame sides like in the picture to the left.
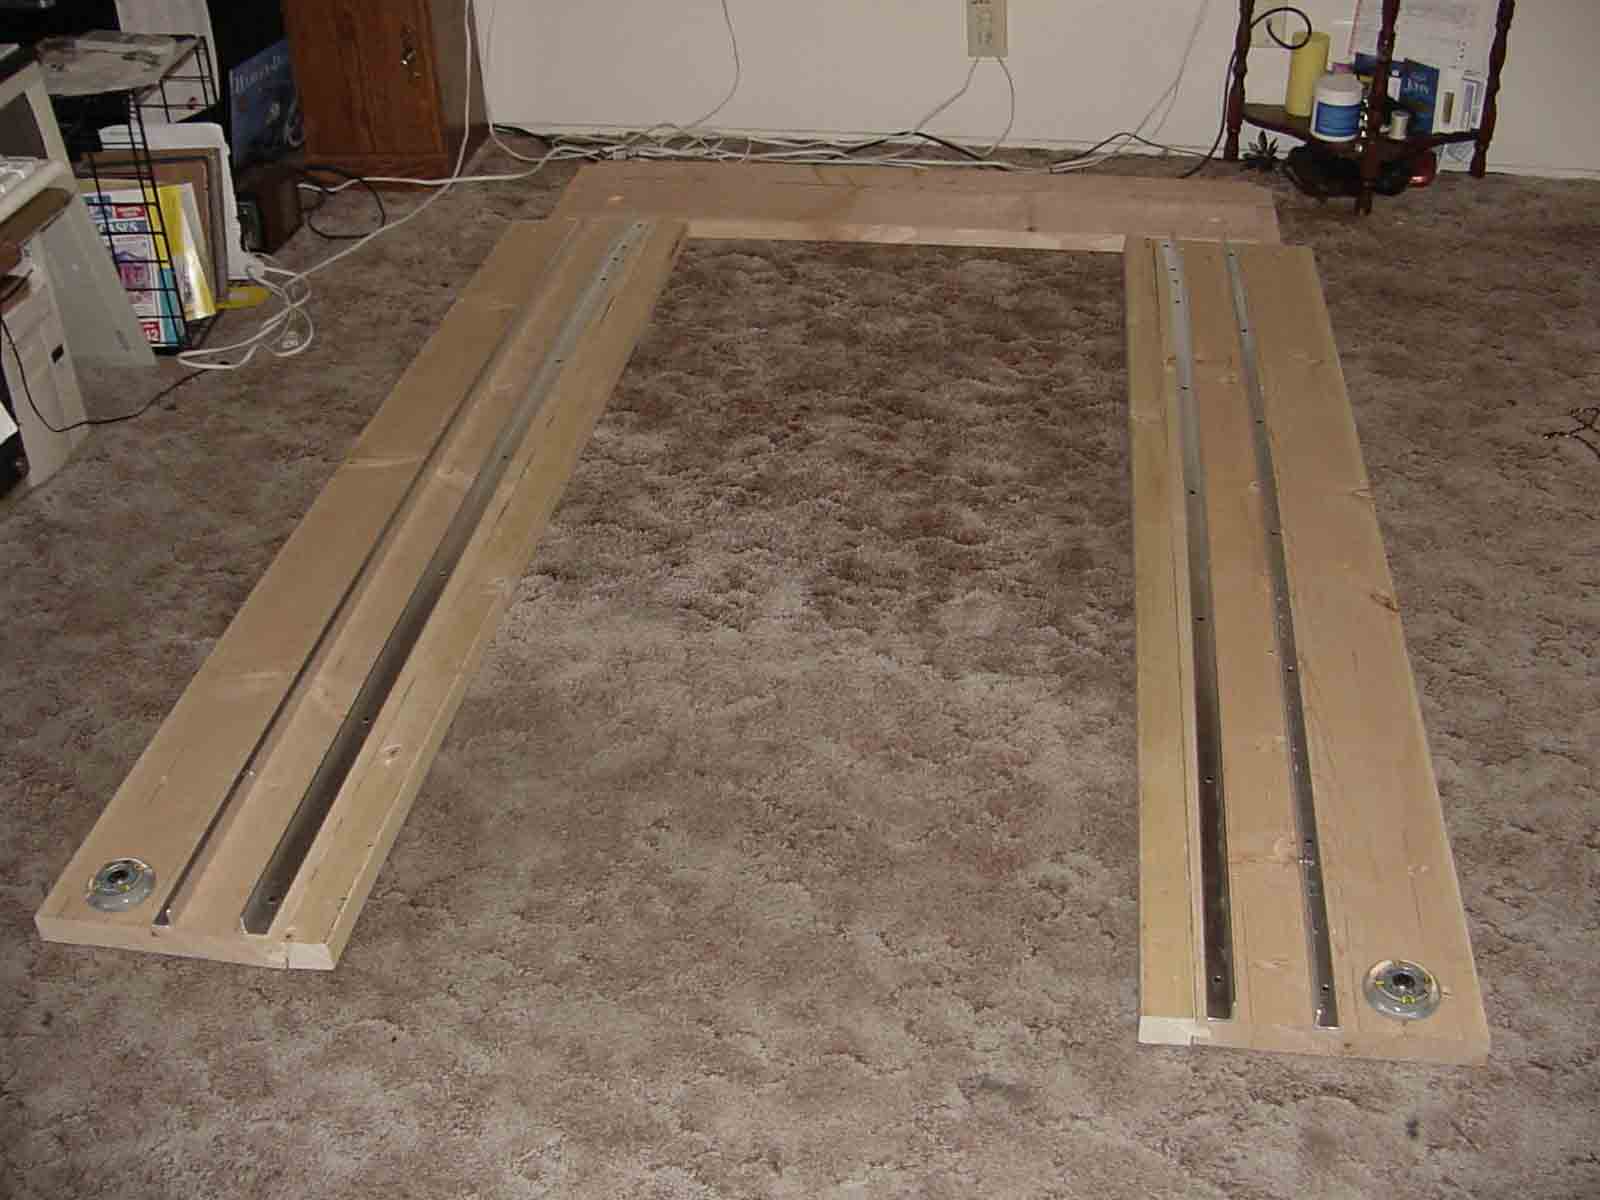
The next thing to do was add rails to the drawer...
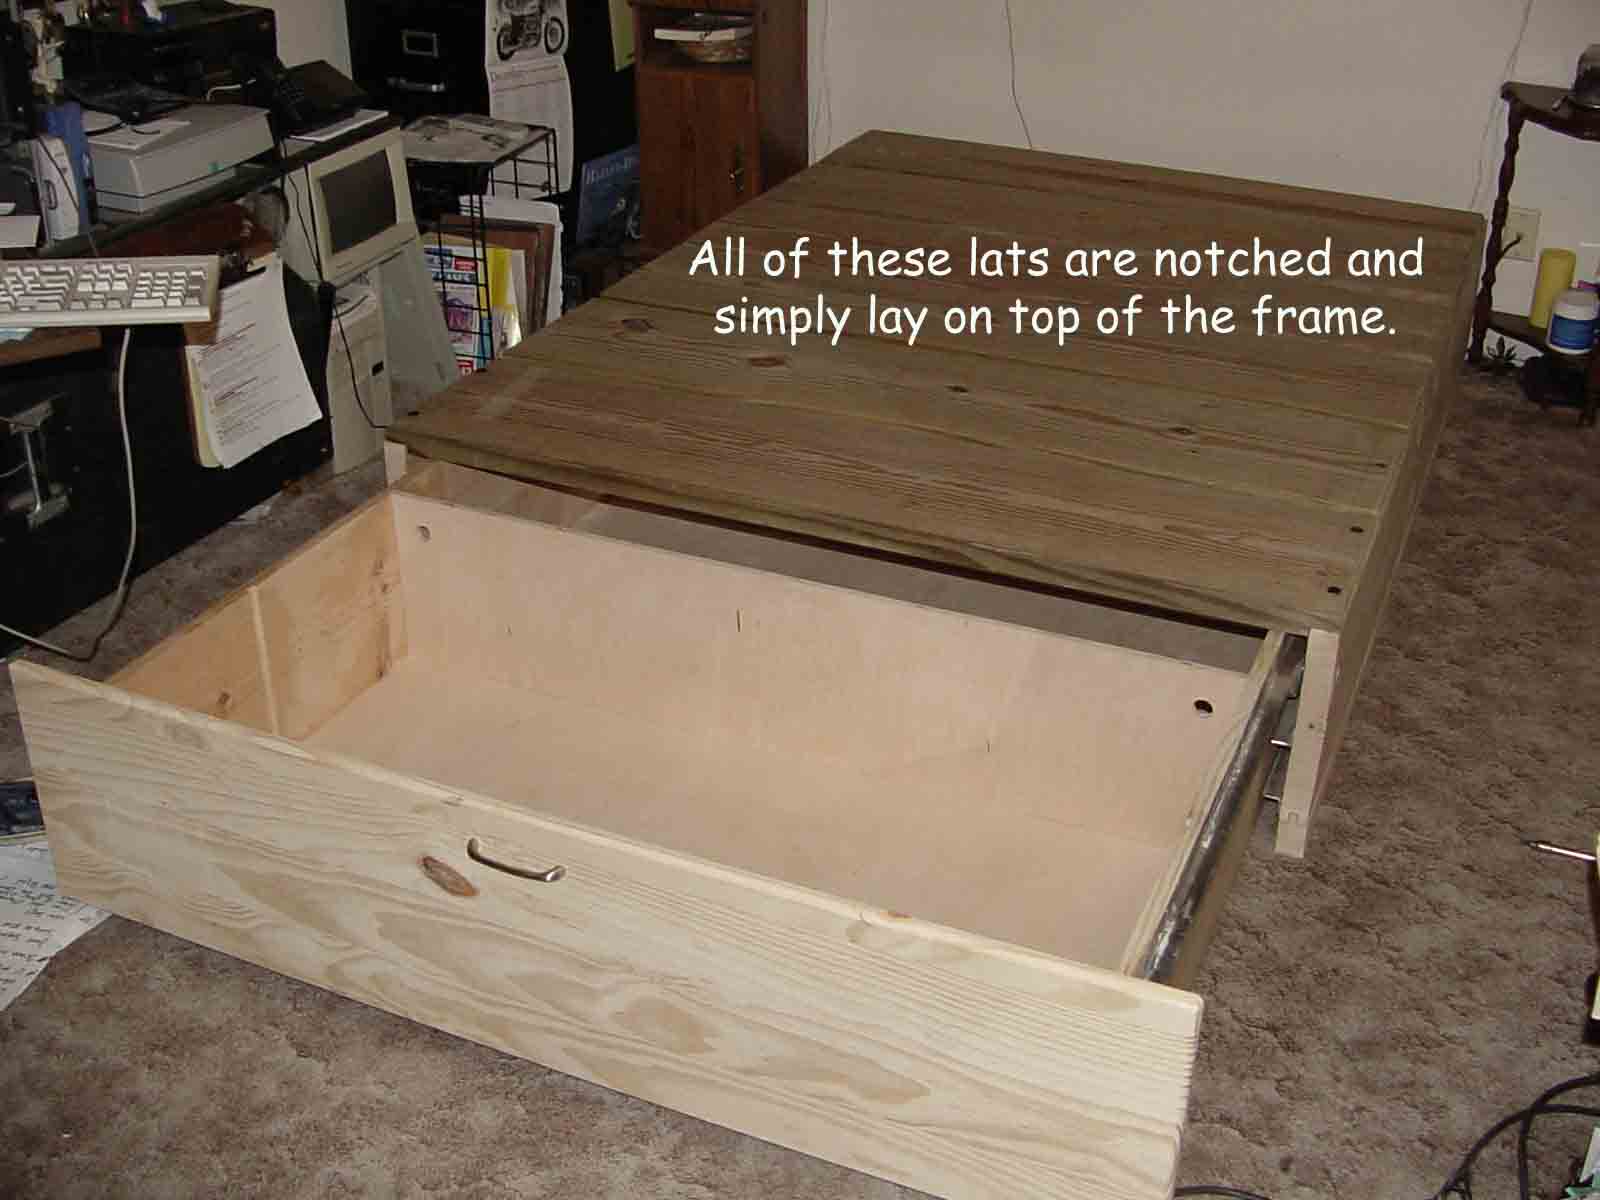
Here's a sequence of shots that show the bed being assembled...
This page is up as of March 18, 2005 - 3:30 AM.
Comments? Corrections? Questions? Please
e'mail me to tell me about it.
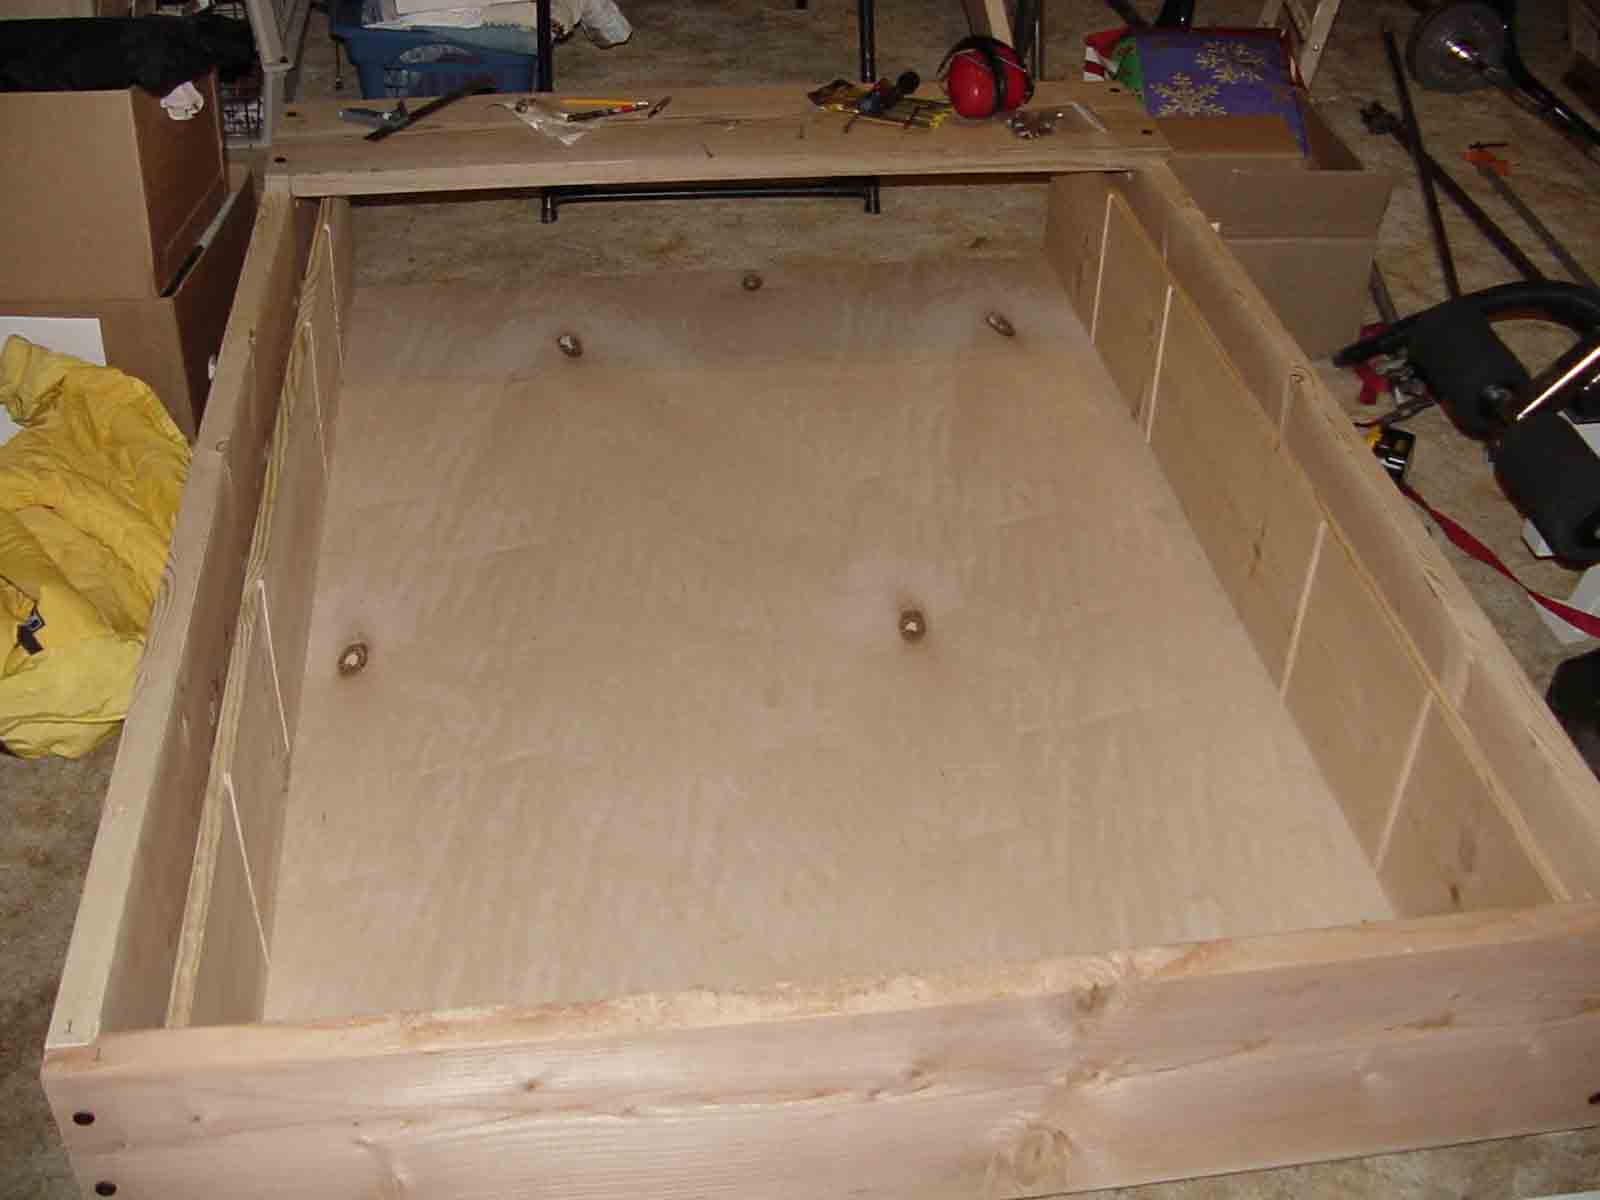
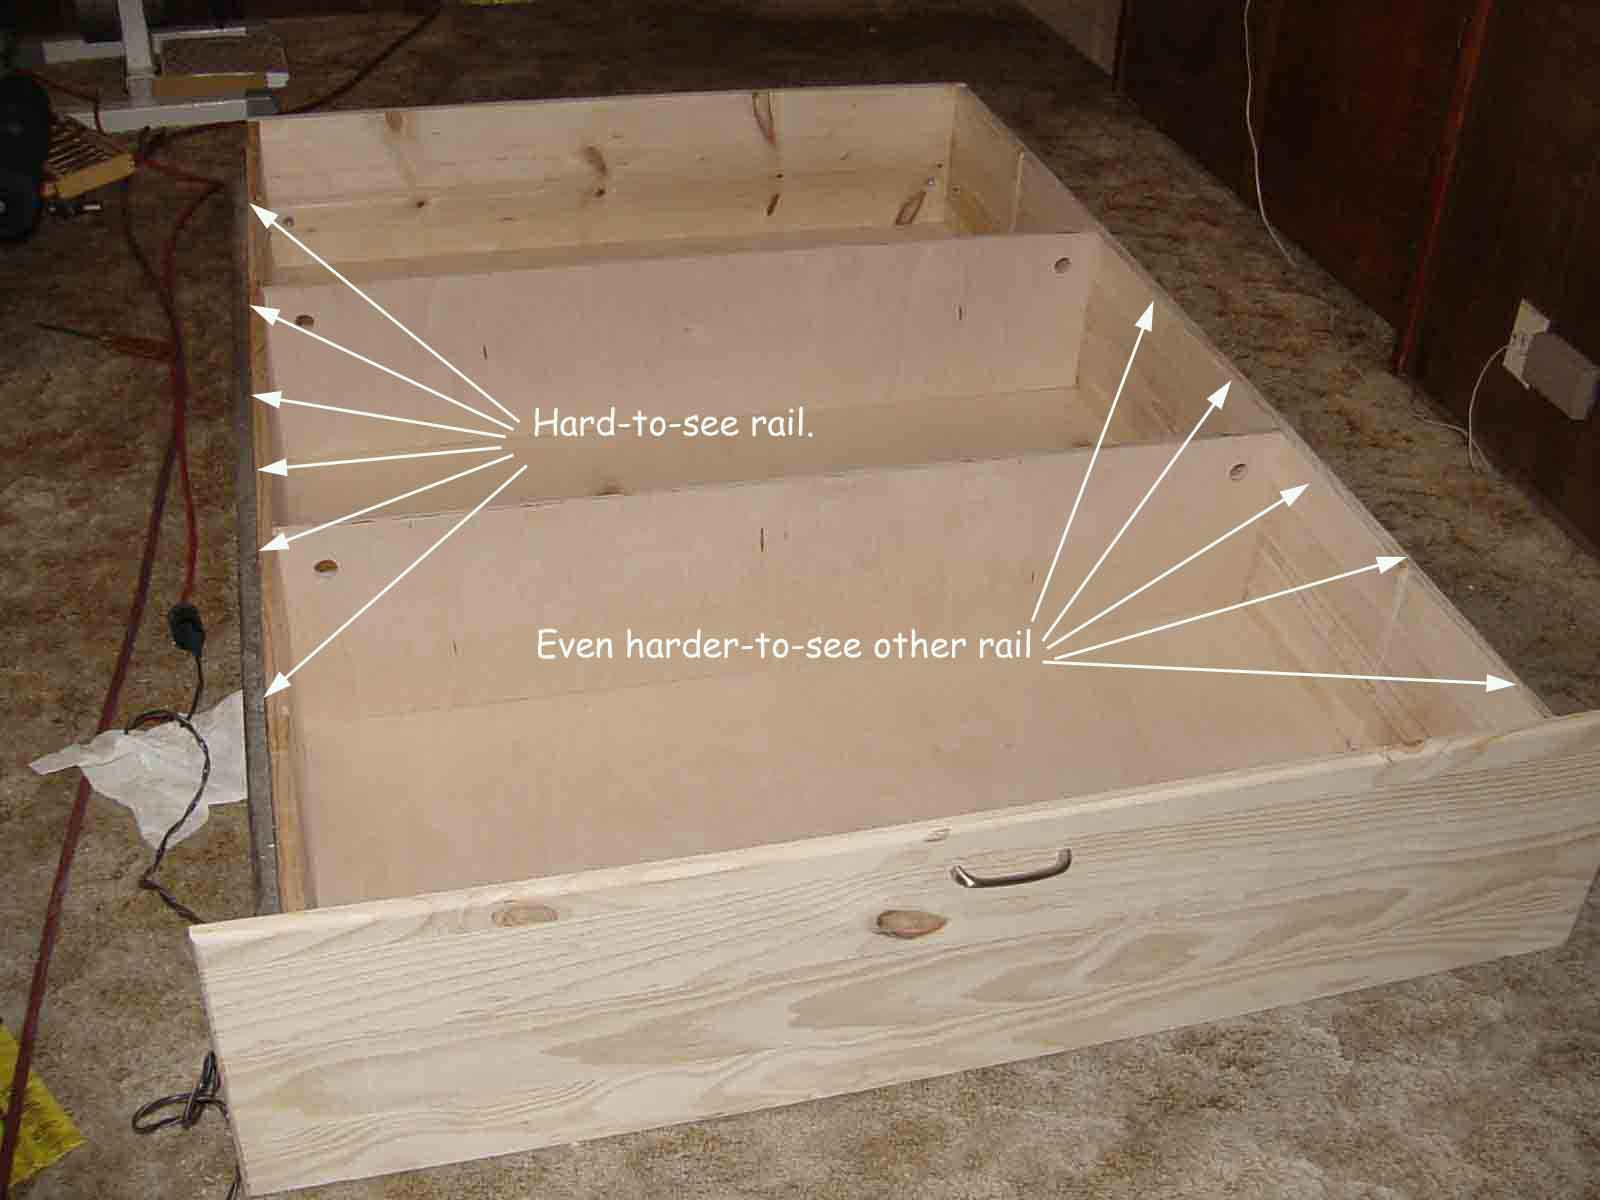
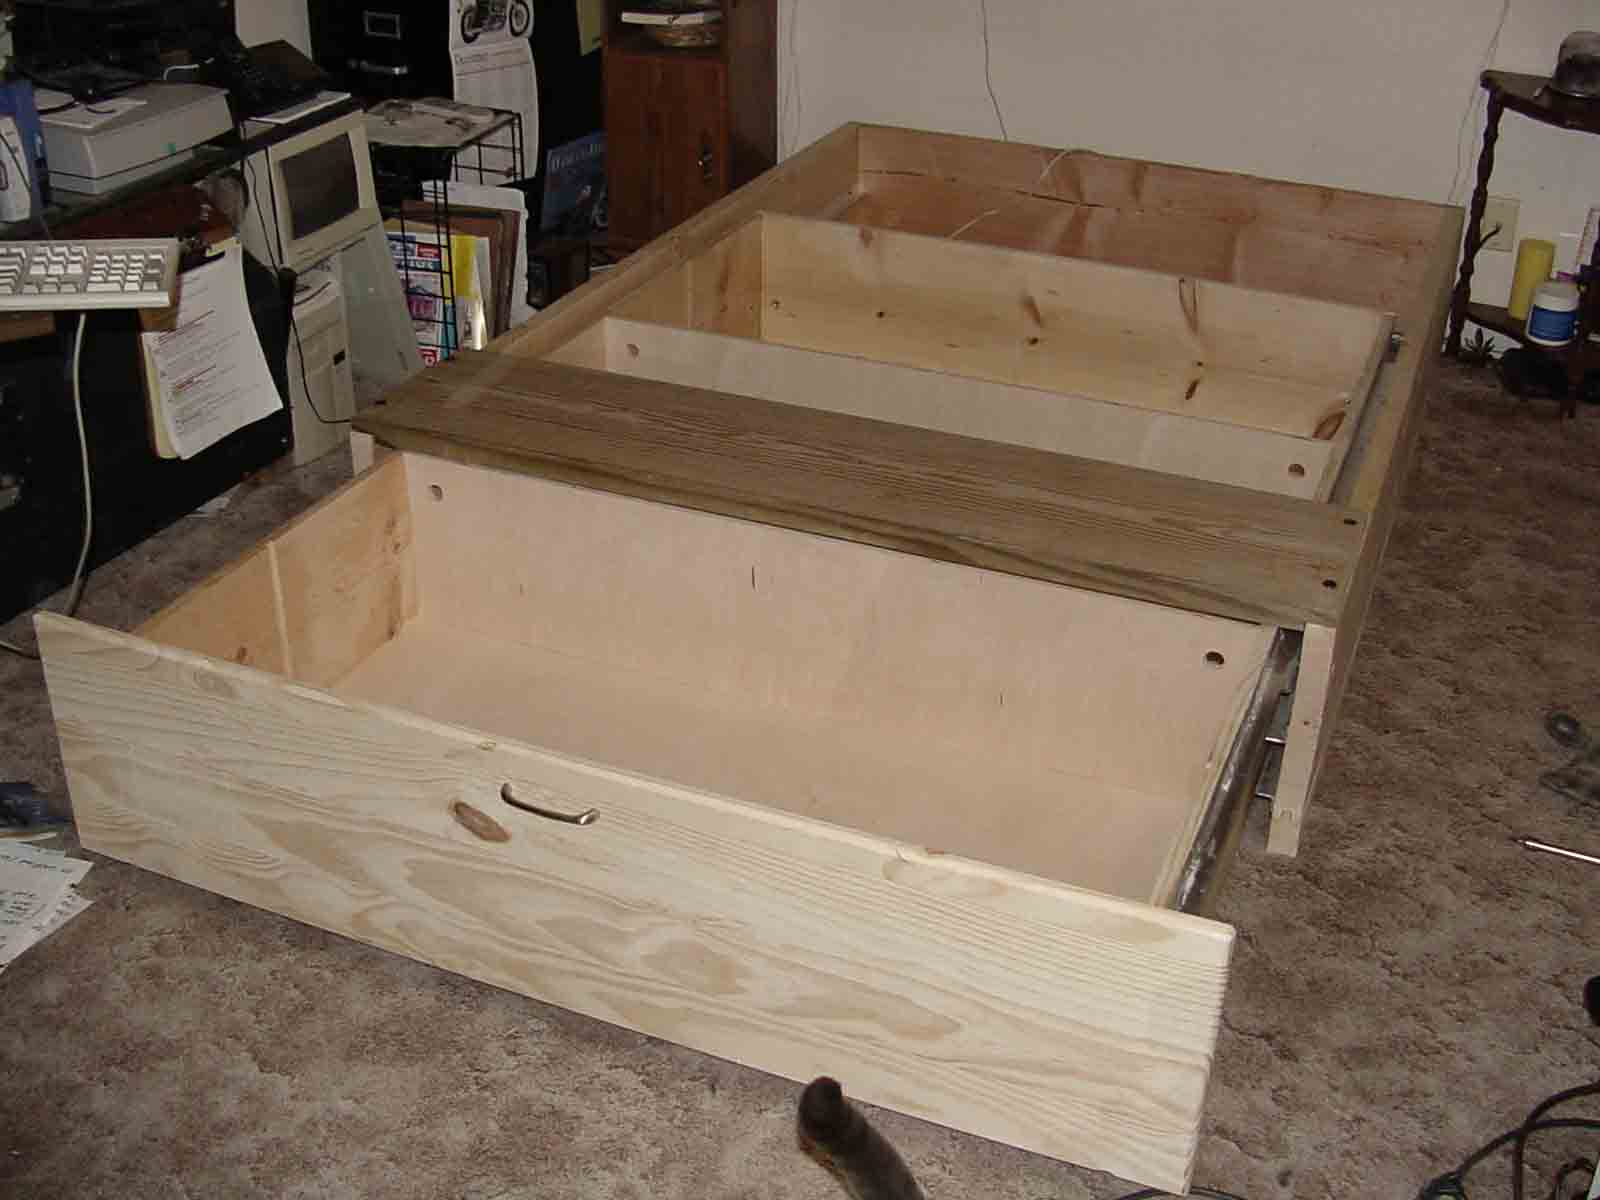
Here's a mock-up of the drawer nested inside the frame. At this point I was happy that everything was straight and had the appearence of fitting the way it should. I could only hope that my estimates for hardware thicknesses were accurate.
The next thing to do was to design a roller track system that would not only make the #200+ drawer easy to use, but would also allow the drawer to extend out its full length. Basically what I did was steal the design of an ordinary kitchen drawer, and super-sized it.
...and then add wheels to the drawer.
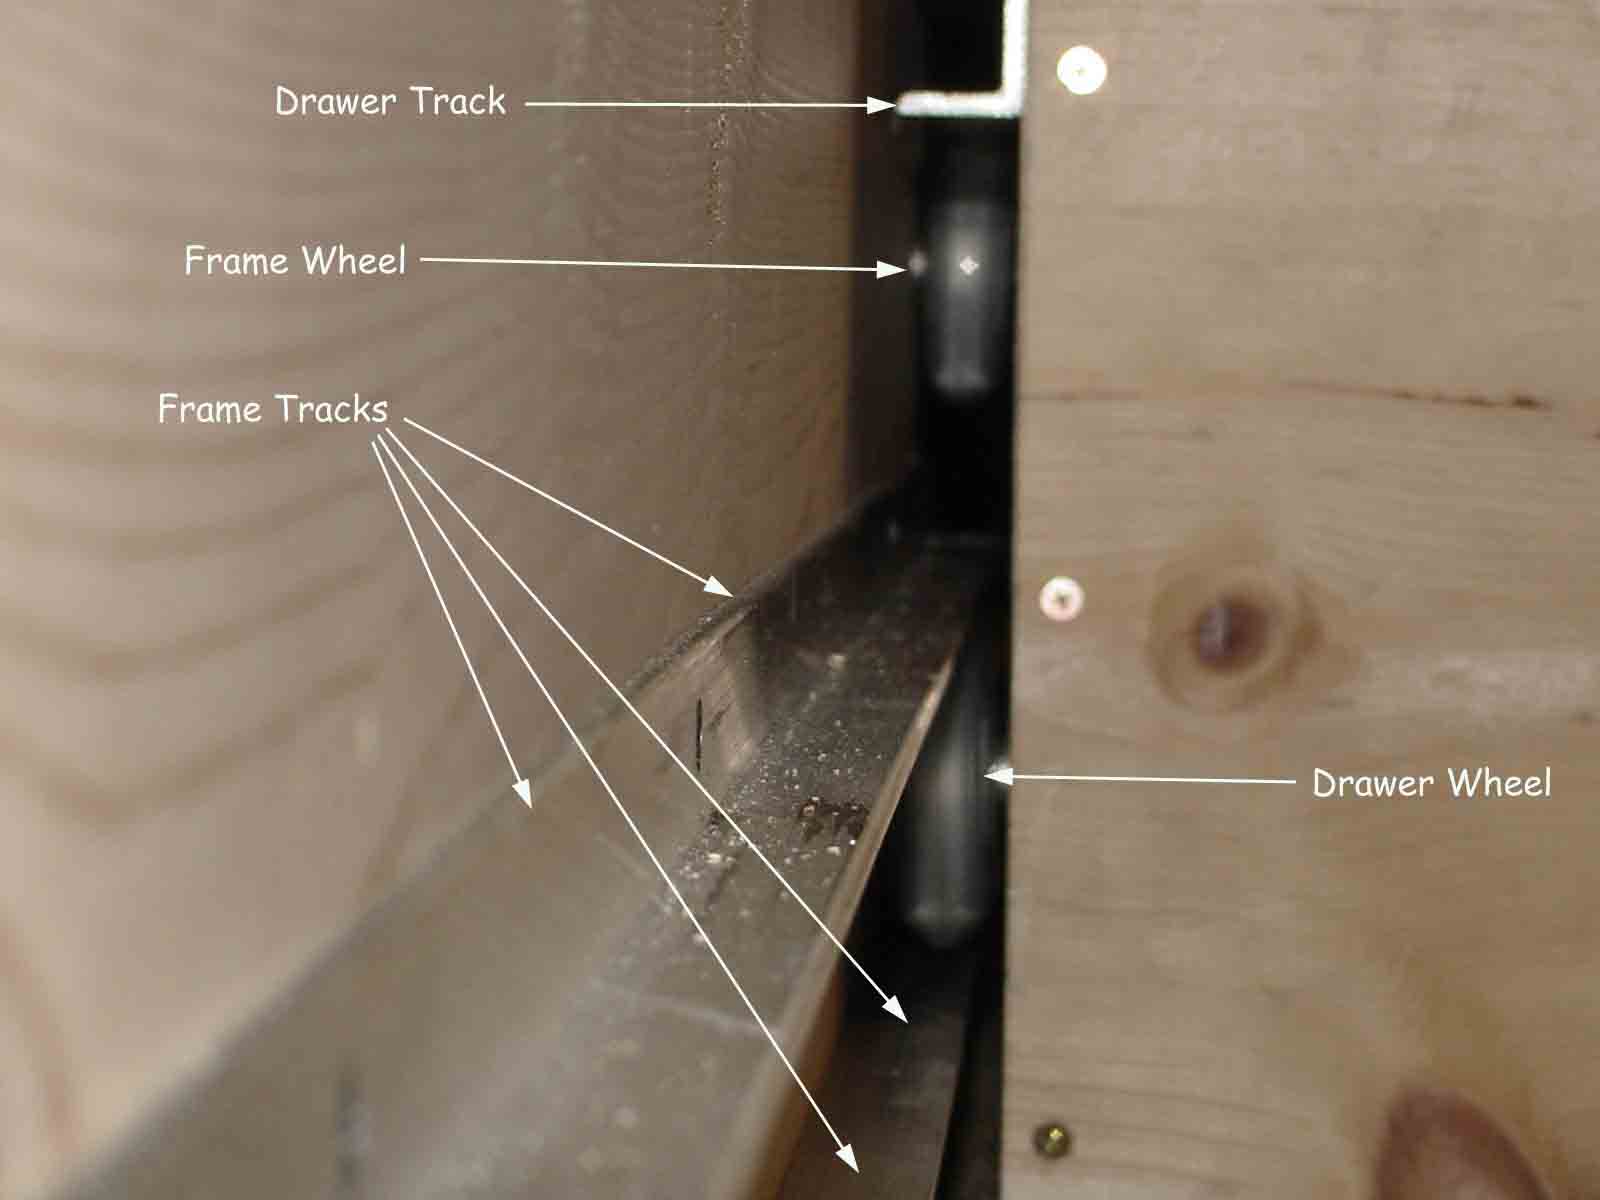
Here's a close-up of the wheel and track system. The wood on the right is the drawer and the wood on the left is the frame. The picture has been annotated for your convenience.
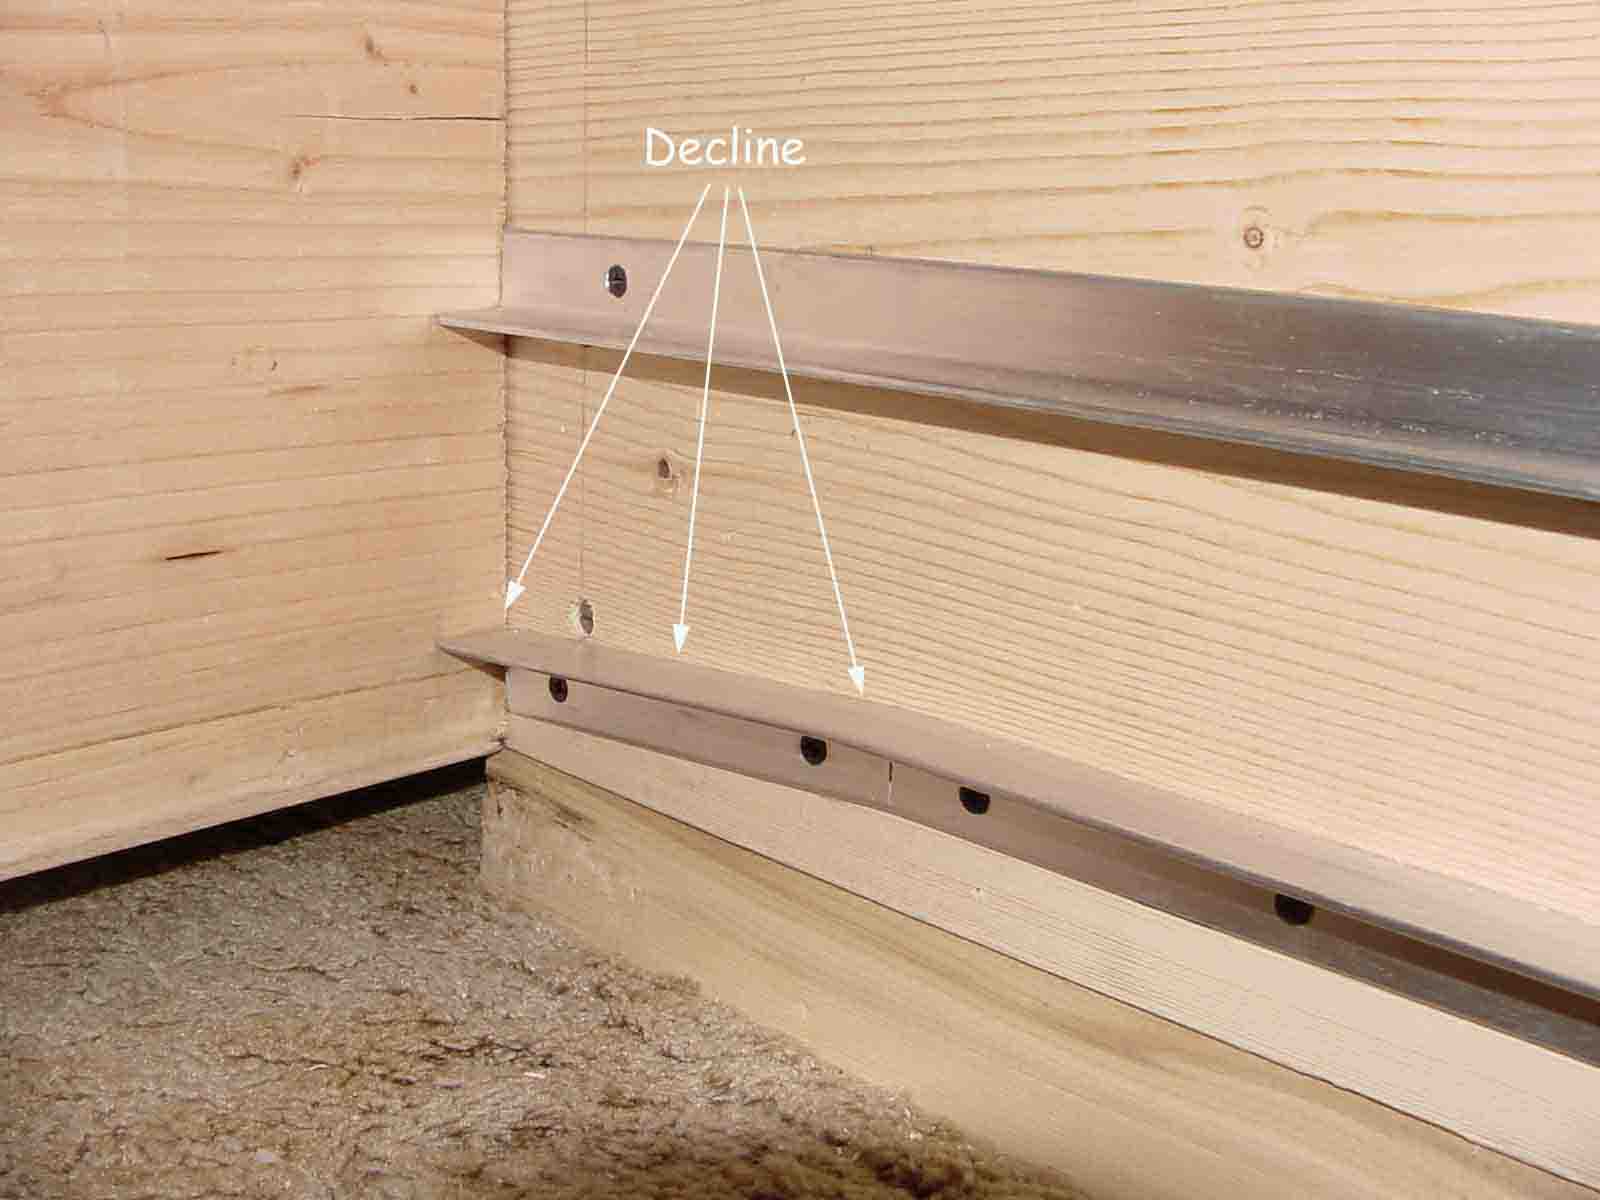
I engineered a decline into the lower track towards the back of the frame so gravity would "pull" the drawer in. This would also insure that, once shut, the drawer would stay shut.
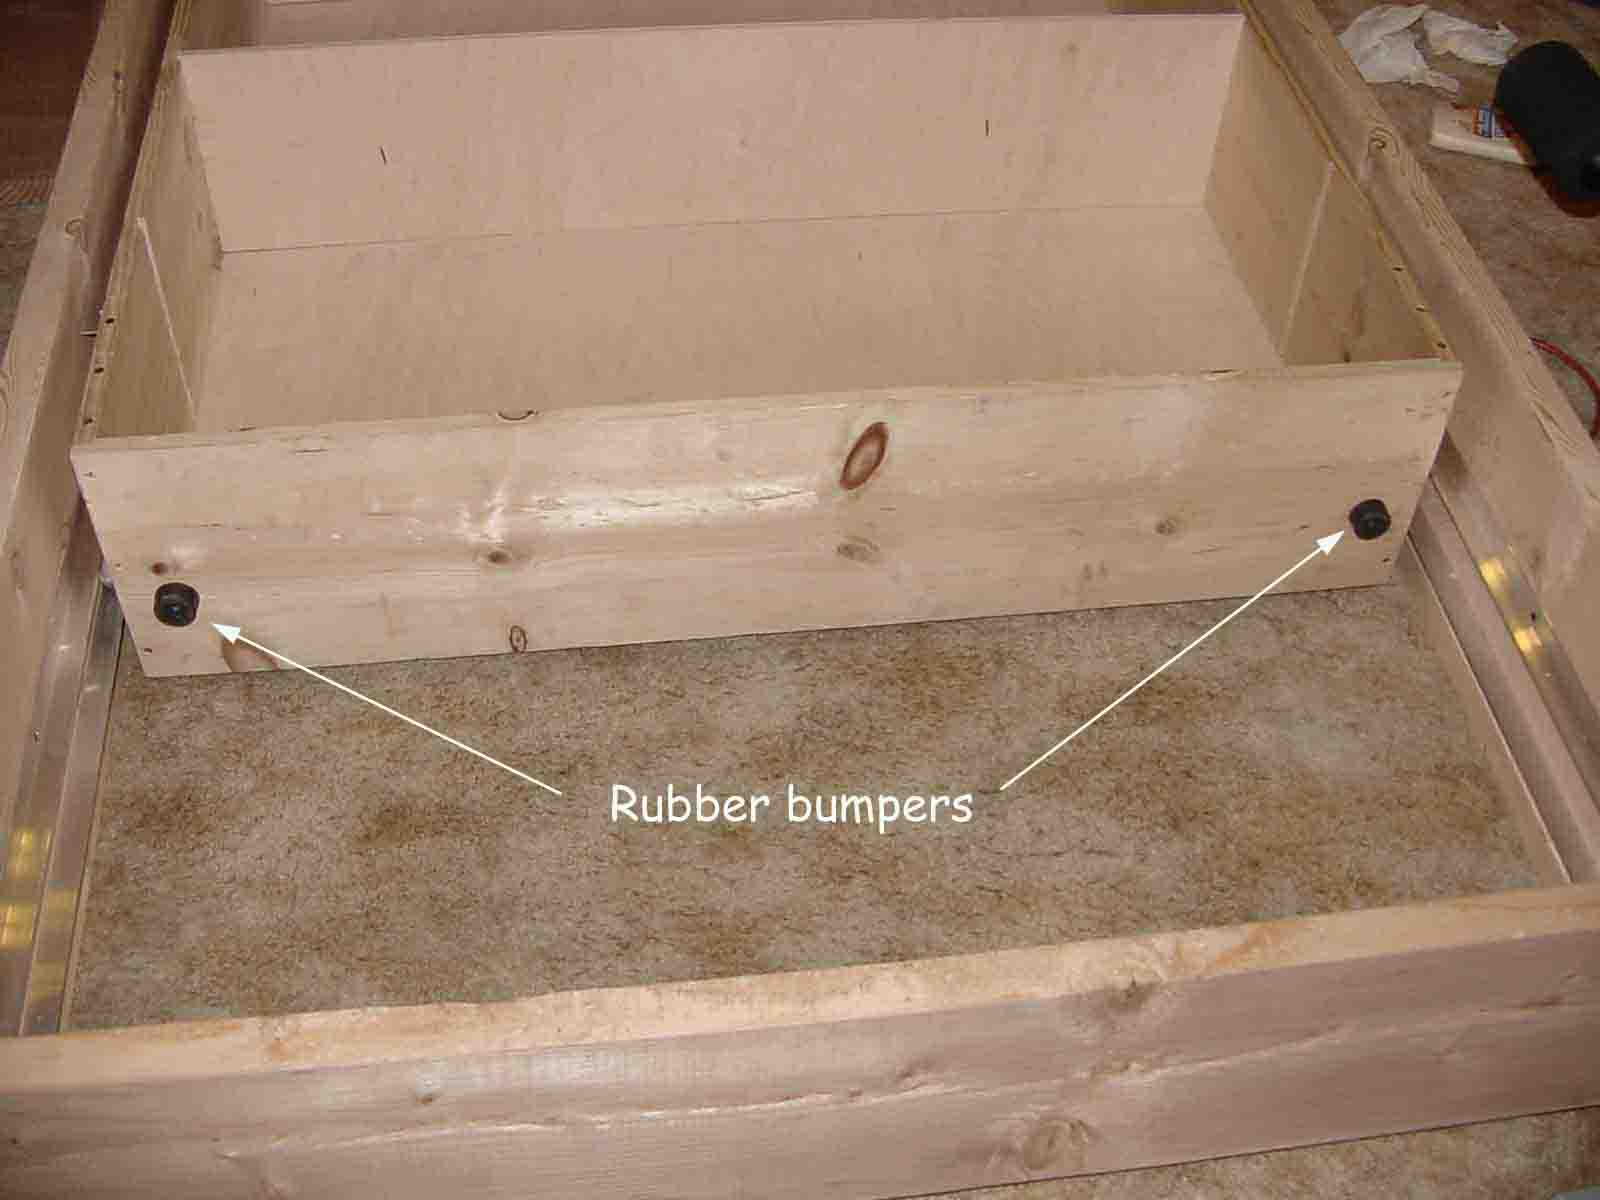
I added rubber bumpers to the back of the drawer so kinetic energy would be transferred there instead of to the front panel. I invisioned the front panel of the drawer being ripped from the rest of the drawer due to too much energy being transferred to the front panel upon closing. As an added bonus, the rubber bumpers absorb a lot of the noise that would normally be generated by two boards smaking together. The drawer now closes quietly without a "thud."
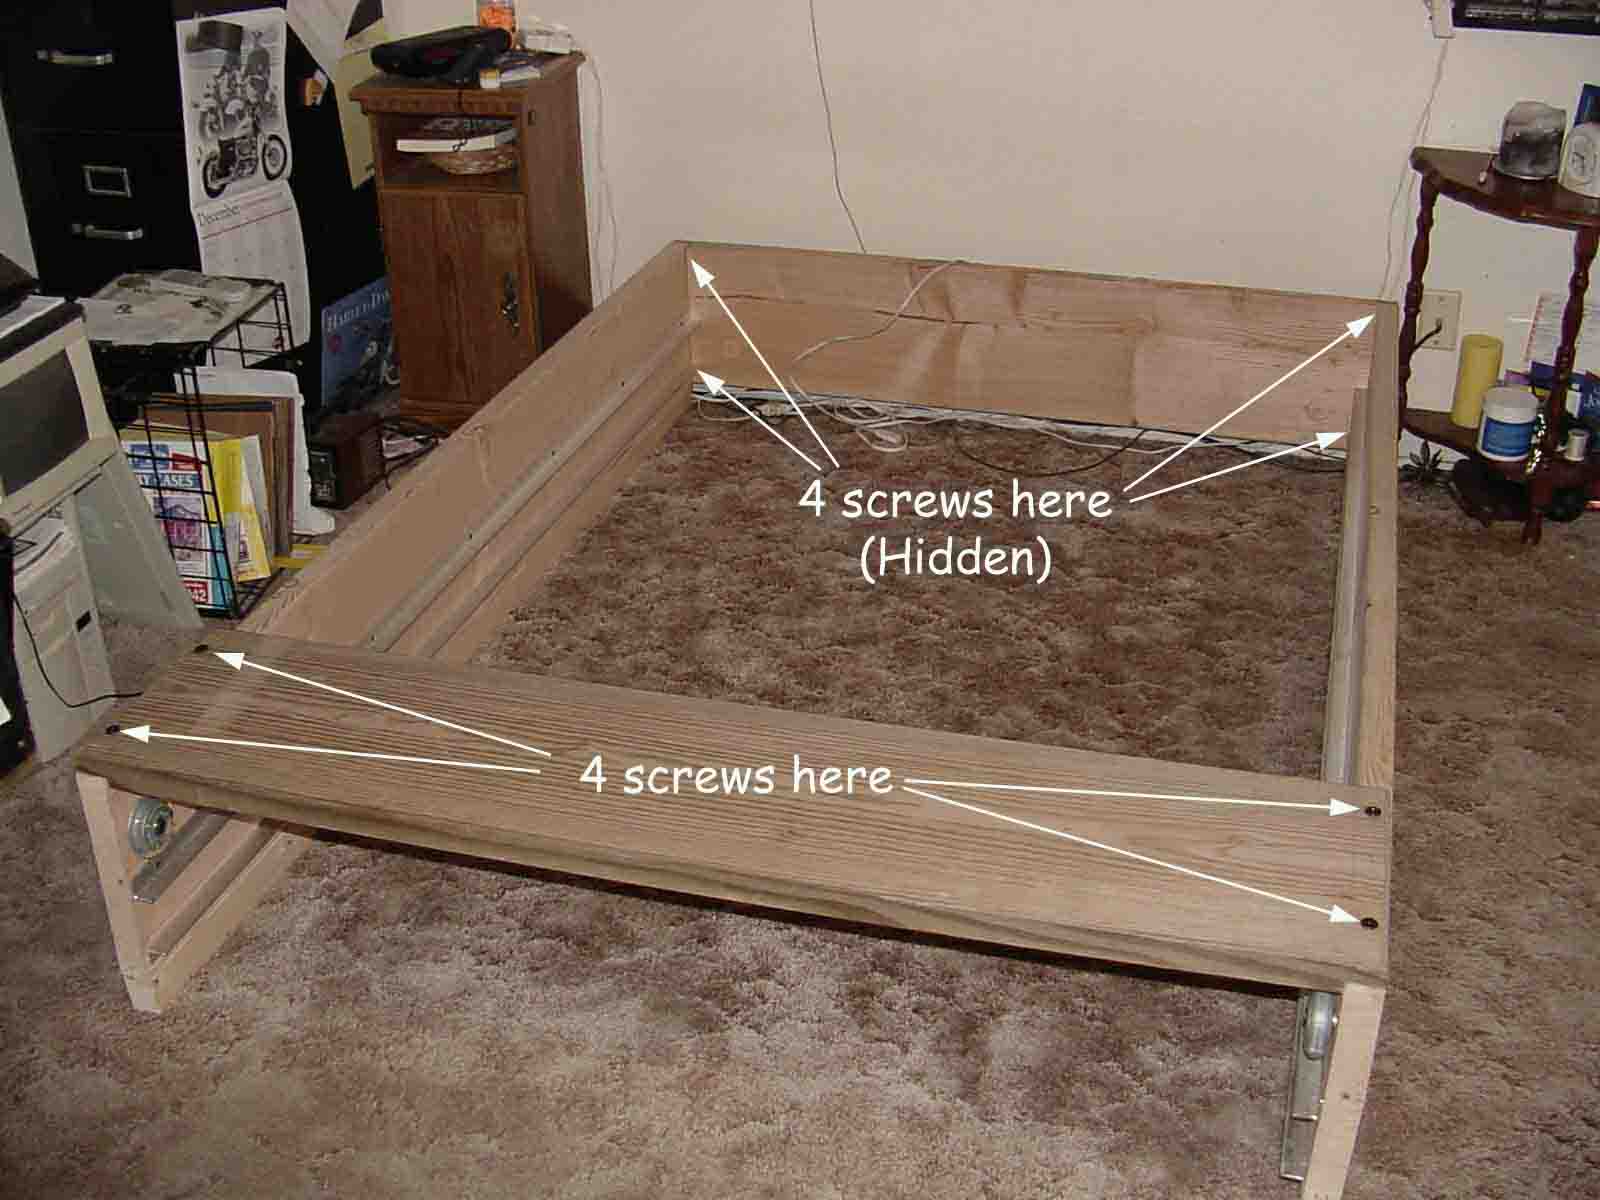
The whole thing goes together in less than 20 minutes.
8 screws hold it together.
(Click on annotated images to enlarge for easier reading)
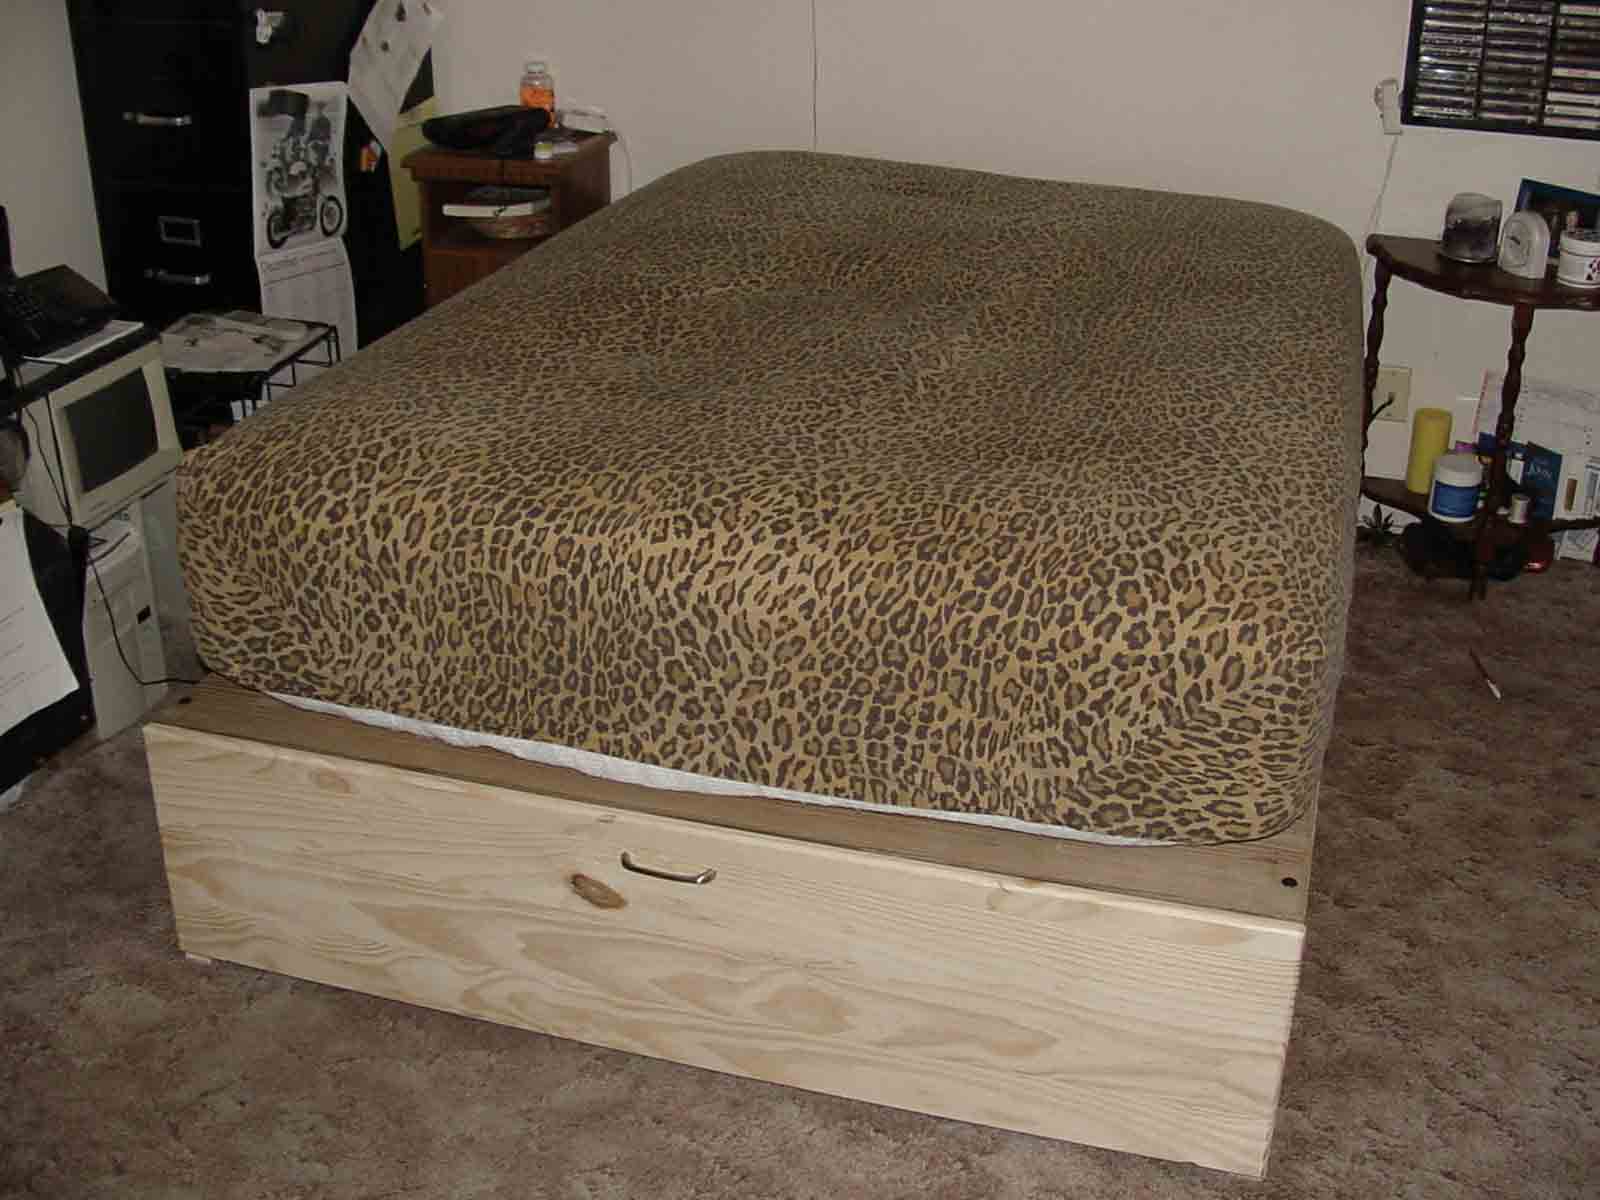

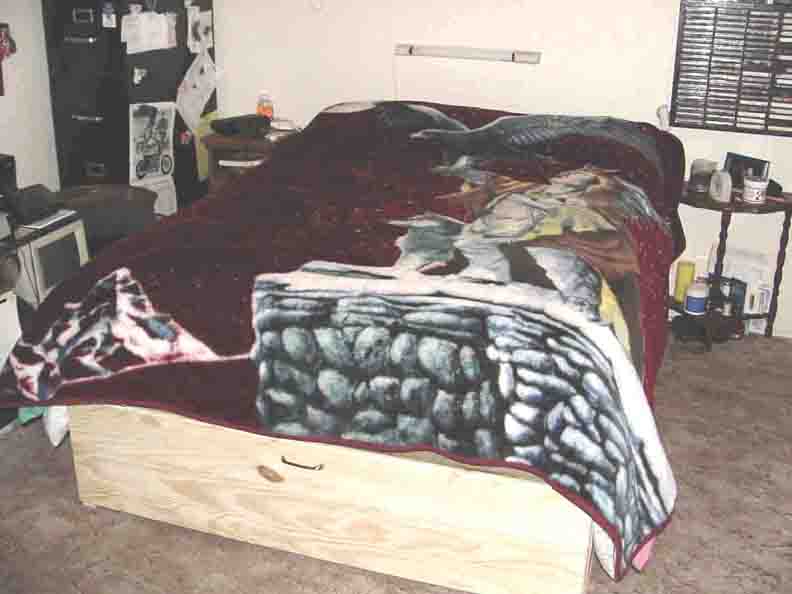
Finished Product!
20 cubic feet of space!!
Julie and I are now the proud owners of this most-functional bed. I hope you enjoyed reading about it as much as I enjoyed building it!

All pictures & material Copyright © 2005 Donnie Frank