|
Why dual headlights?
Years ago, when I first purchased Carley, I was always on a quest for better lighting. I travelled a whole bunch with my band,
Della Street
(on Carley, of course), and was always looking to better illuminate the road. Running into large game was always a concern and NOT something I wanted to do.
I tried many different high-wattage lamps to no avail. The light they provided was great, but ultimately I couldn't get more than a month or 2 out of any of these very expensive high-wattage lamps. So instead of doubling the wattage for a single lamp, I decided I would just add a fixture - essentially achieving the same results, but in a different way. I found the dual-headlight setup to be advantageous because instead of having all my eggs in one basket, like with that 1, high-wattage lamp, I now had 2 lamps. If one burned out, I still had a spare. Another advantage was that I was no longer using these expensive 2 month lamps. Now I was back to using the less expensive and longer lasting 2 year lamps.
I quickly discovered that I didn't like the amperage draw of having 2 headlamps on all the time. When I would sit at a traffic light, my ammeter would dip into the negative 10 amp range. This was no good. The obvious solution was to put the "spare" lamp on a toggle switch. This way I could run one lamp in the city, and then turn on the second lamp out on the open road or when it rained and the roads were wet. The open road was the place I needed extra light anyway. I didn't need extra light within city limits.
Since the top lamp is a dual filament lamp (just like the bottom lamp is), an ordinary SPST (Single Pole, Single Throw) switch wouldn't do. I was going to need a 2-pole switch, one pole for each filament (high-beam and low-beam) in the upper lamp. This switch would also have to be rated to at least 5 amps. I found the perfect switch at the electronic surplus store for like 2 bucks. I've had this switch installed since 1992. It's been working perfectly.
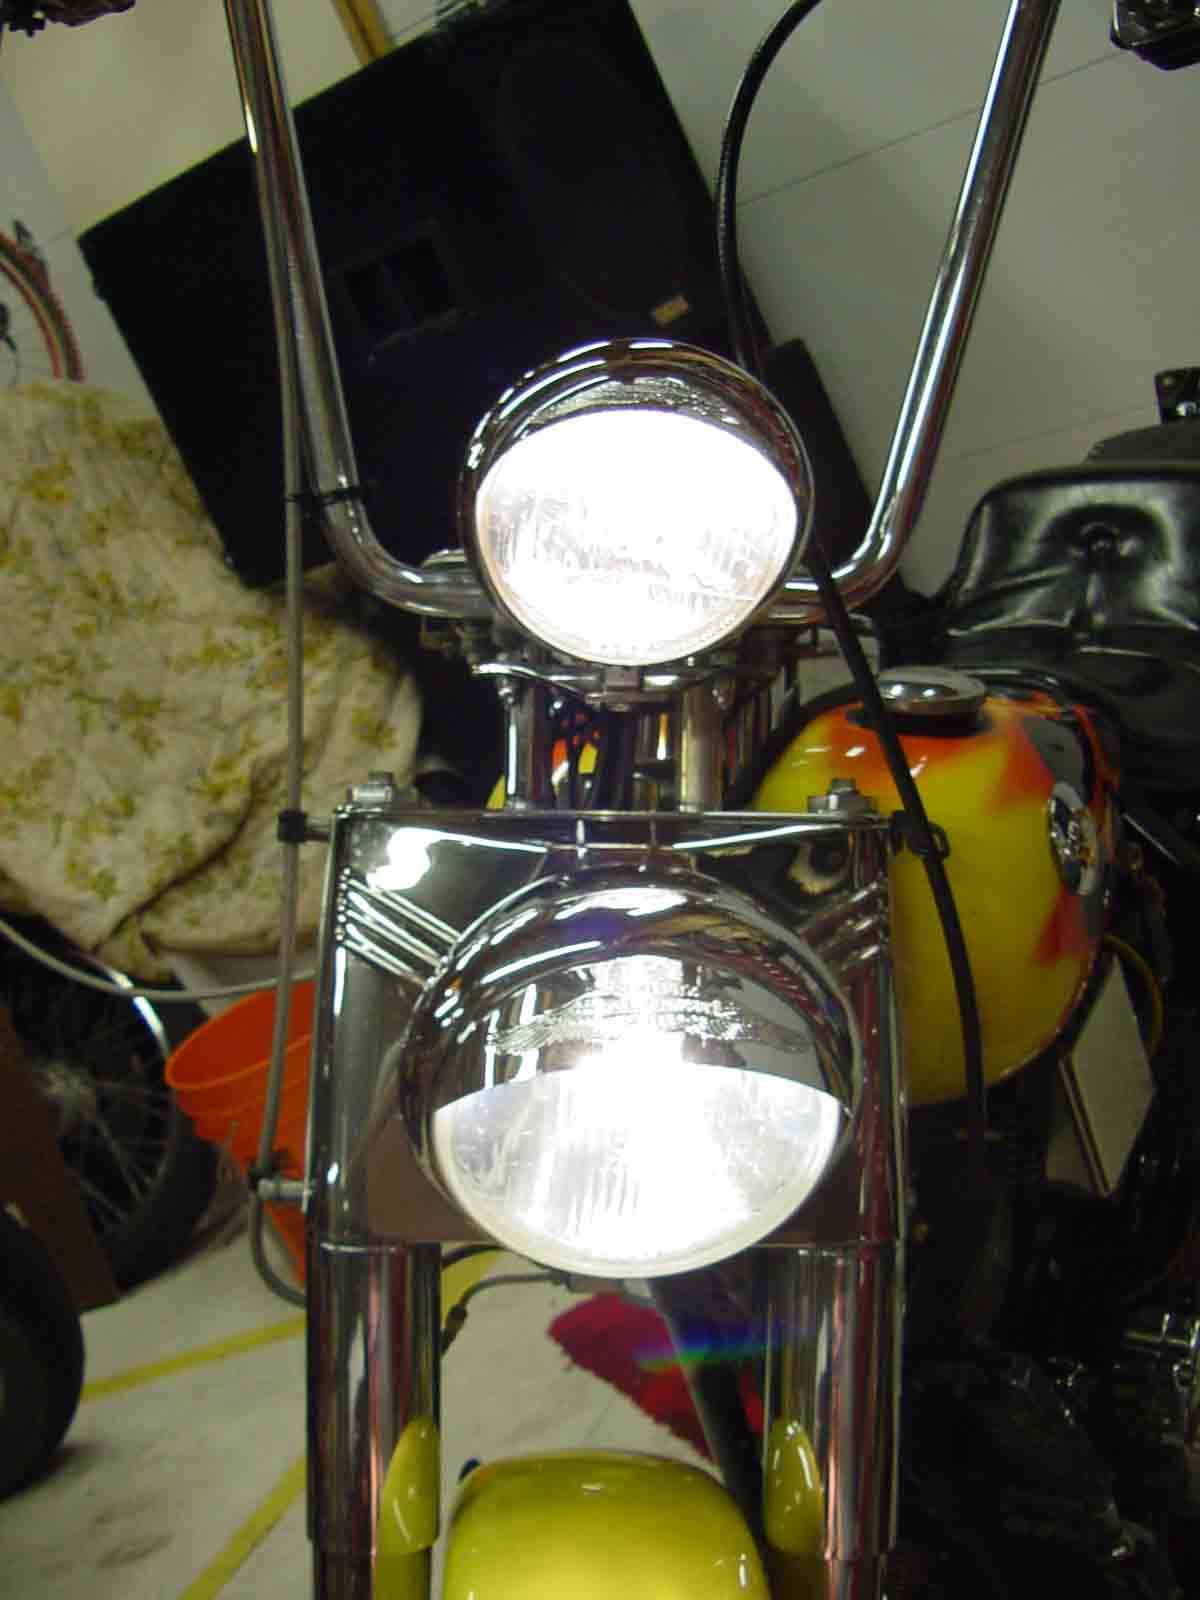
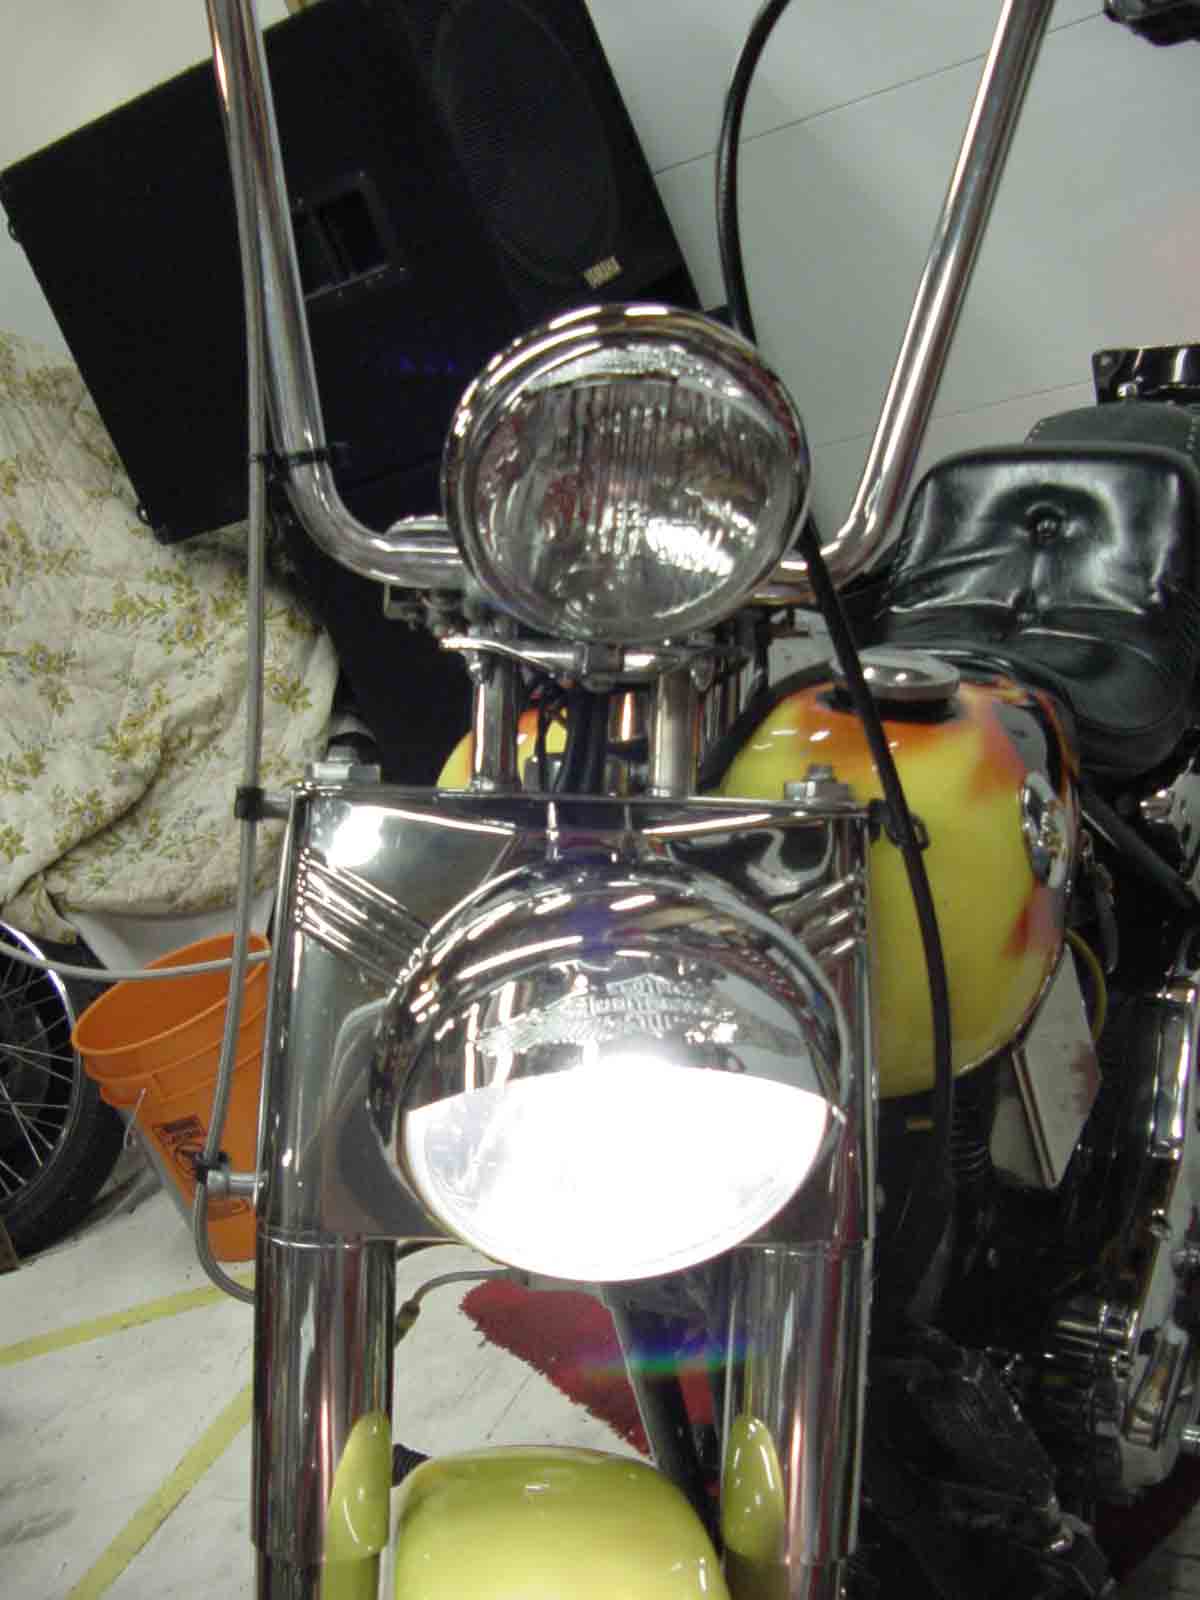
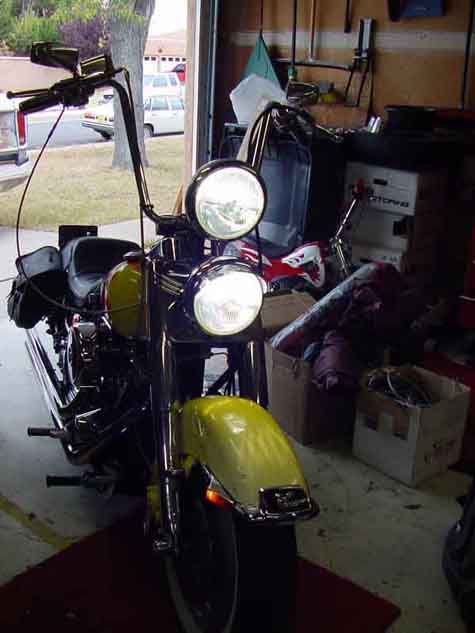
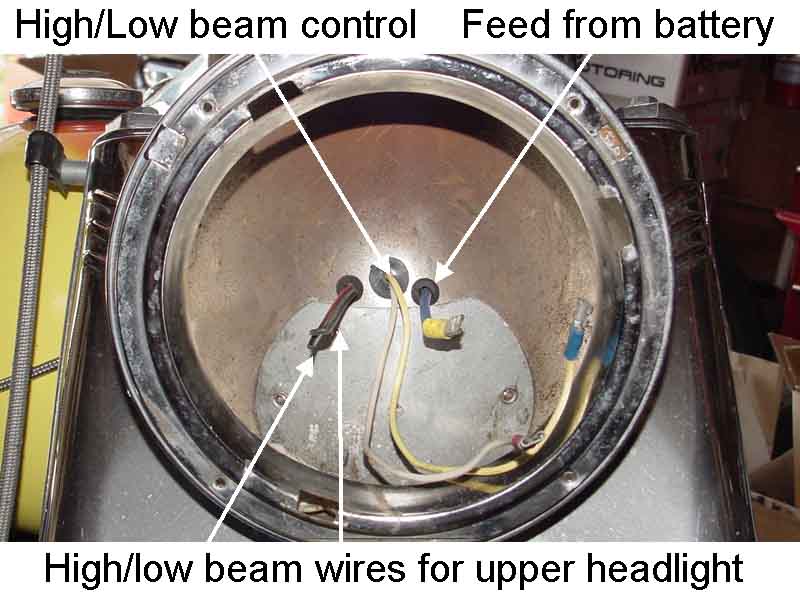
Here are a couple pictures of the headlamps in various states:
Here's a picture of the toggle switch that controls the upper lamp. It has been purposely mounted on the "downward" side of the nacelle so that gravity would pull water away from the switch. This engineering scheme has worked like a charm.

Click on picture for extreme close-up!!
Here's a schematic of the wiring required to facilitate this installation.
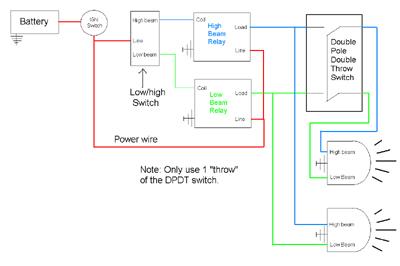
Click on image for larger view
 Carley gets an HID (HMI) upgrade... Carley gets an HID (HMI) upgrade...
First I'd like to cut through some of the bullshit being tossed around the automotive lighting industry...
"HID" stands for "High Intensity Discharge." The automotive lighting industry often uses this term to describe the latest automotive lighting technology, which is "Hydrargyrum Medium Arc-length Iodide" or "HMI" for short. Unfortunately, because the term "High Intensity Design," isn't specifically defined by ANSI, IEEE or the DOT, manufacturers of cheap immitations adopted this term to describe their inferior lighting - which is often nothing more than a
halogen bulb with a blue coating...
shameless...
The quickest and easiest way to tell if you're getting a true HID lamp is the price. If the lamps you're purchasing are under $50.00, guaranteed, they are NOT HMI lamps. The second easiest way is that an HMI lamp requires a ballast to "strike an arc" (much like a welder strikes an arc to start the welding process). True HMI lamps come in a "kit," which includes ballasts and other wiring. Cheap immitations will have no ballast or extra wiring. So for the rest of this page I will refer to HMI lamps as such, and not as HID.
Though HMI technology is fairly new to the automotive lighting industry, HMI lights have been around for a long time. Because of their efficient nature, they are commonly used to illuminate parking lots, convenience stores, outdoor sports arenas, softball fields, volleyball courts, tennis courts and other dark areas that need lots of light. They are easily spotted by their cooler, "bluer" appearance. The film industry also uses HMI lamps, but on a monolithic scale. Where most parking lot lights are rated in the 1000 watt range, typically the film industry uses HMI lights in the 6,000 - 18,000 watt range.
Also, the term "cooler color tempurature" is actually kind of a misnomer. Even though the "color temperature" of an HMI light or "ARC light" is
typically 1000 degrees hotter than its incandescent counterpart,
the lighting industry calls the HMI light a "cooler" light. I imaging that this is because your typical person intuitively associates blue with water and orange with fire. Therefore, lighting industry people toss aside technical convention and call HMI lights "cooler" and incandescent lights "hotter."
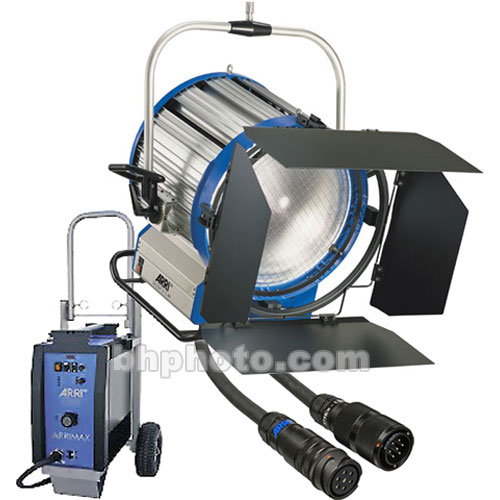
(Photo courtesy bhphoto.com)
The big changeover (motorcycles vs. automobiles)...
Changing from OEM Halogen lamps to HMI lamps is not a big deal in an automobile. There is plenty of room for ballast placement and wire management. A motorcycle, however, is another story. Unfortunately, with limited room, one has to be very creative where one places the ballast. Because of the wiring configuration conducive to a ballast, it is best to fit the ballast inside the headlight nacelle as opposed to remotely locating the ballast on/in some other part of the bike. This is because the ballast is fed on the "line" side with a single, small guage power wire (#14?). It then discharges or "outputs" a 50,000 volt charge on the "load" side to the headlight (to facilitate striking an arc in the lamp). These "load" wires are heavily insulated, therefore very thick, therefore hard to manage. In addition, while the line side of the ballast (the power side) can be grounded anywhere (like inside the headlight nacelle, for instance), the "load" side should be grounded directly to the lamp. So now instead of running 1 small wire to your headlight nacelle, you would have to run 2 large wires into your nacelle. Add another small guage wire (#18?) for power to the solenoid for the dual (lowbeam=HMI/highbeam=HMI) kit. The small, solenoid power wire would have to be run into the headlight nacelle regardless of ballast location. The solenoid can be grounded inside the nacelle, again, regardless of where the ballast is located. In my case, with 2 headlights, locating the ballasts outside their respective nacelles would have been a wiring nightmare.

The kit I chose for Carley was the "H4 Low=HMI/High=HMI" kit. The more popular kits have a fixed HMI low beam and a fixed halogen high beam. For me, this configuration had many disadvantages, so I went with the dual "low=HMI/high=HMI" kit.
The "dual" kit utilizes a solenoid which physically moves the lamp inside the reflector. Many optophobestm argue that this method inaccurately locates the lamp in relation to the reflector, thus producing unpredictable and undesirable results. It's been my experience (so far) that this "moving lamp" technology works just fine. A solenoid is a very simple, robust device. I am perfectly confident my solenoid will last as long as the lamp, which is rated at 3,500 hours.
Disadvantages of the dual HMI setup...
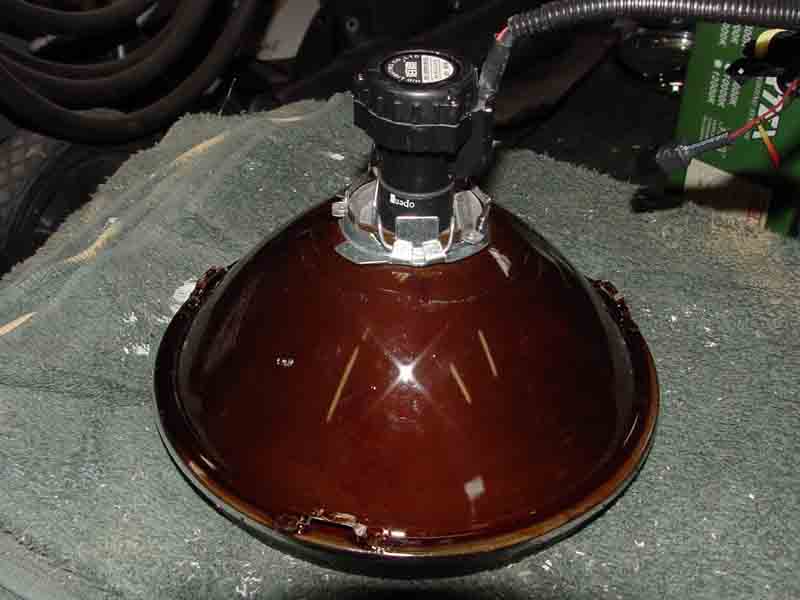
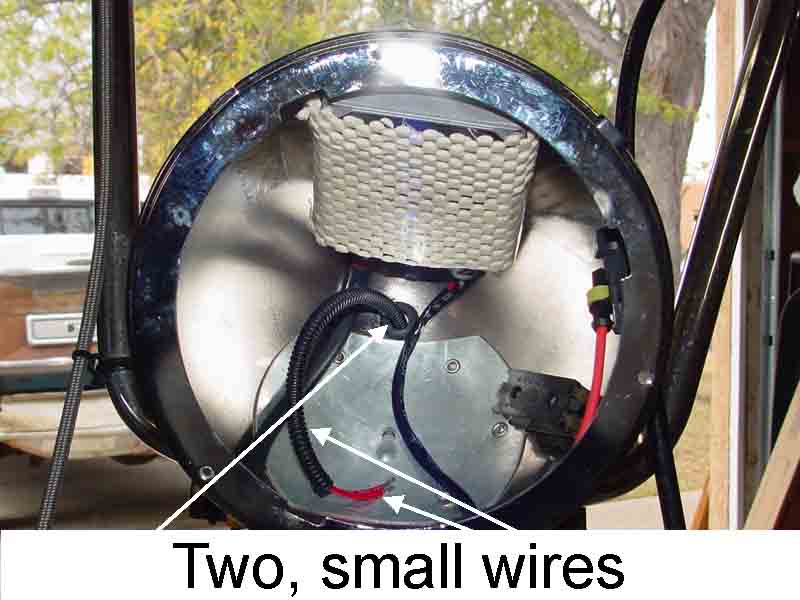
If you look at the picture below, you can see the solenoid behind the reflector. In a car installation this needed inch of space behind the reflector probably wouldn't be an issue. In a motorcycle, however, it is a big deal. Because this rather large solenoid mechanism lives directly behind the reflector, there is very little room left inside the nacelle for all the other stuff (wires, ballast, etc.). As one could imagine, the space behind the reflector tends to fill rather quickly. This particular setup (pictured below) barely cleared the back of my nacelle by 1/8". If one gets even one wire stuck behind the solenoid, chances are you would not be able to button up the nacelle.
Extra real-estate required by the solenoid makes fitting the ballast a real challenge. It took a LOT of creative placement of the ballast and control device to make this setup fit. I had to remove the protective panels from both ballasts. Since the inside my headlight is not a hostile environment, and the ballasts innardstm are completely ensconced in epoxy, I'm not too worried about the missing, protective covers.
UPDATE...
After roughly 3 years of use (August 2006 to July 2009), I burned out a ballast. I typcially get 2 years of use out of a typical halogen bulb, and about 2 months out of a high-output halogen bulb. So the HID kit has proven to be a good investment. 3 years ago I paid over $200.00 for the kit. As of this writing, the same kit cost about 70 bucks.
Now back to our regularly scheduled program...
The "control device" that facilitates operation of the solenoid mechanism is little more than a set of mini relays in a housing. I figured that this control box probably took up as much room as an "ice cube" relay, so I just left it. If it ever fails, you can bet it will be replaced by the old standby "cube" relays I've been using for years.
Wires, wires everywhere!
The kit came with a bunch of intimidating looking wires. If you follow the directions, automotive installation is pretty easy. All the plugs are indexed and polarized (male or female), so it's pretty close to impossible to screw up the installation on this particular kit. However beware, not all HMI kits are created equal. Some kits do allow misinstallation. When you purchase an HMI kit, look for key words like "polarity protection" and "indexed connectors," etc. Though not all kits are idiot-proof, I have found most of them to be idiot-resistant. Don't install the kit in a hurry. Set aside at least 1/2 hour to read through the directions thoroughly.
The reason I chose an automotive kit for my Harley over a motorcycle kit was simply cost. The automotive kit is essentially 2 motorcycle kits. This would allow me to outfit both of Carley's headlights with HMI lamps for about 60% the cost of 2 motorcycles kits.
Ripping out all the old wires...
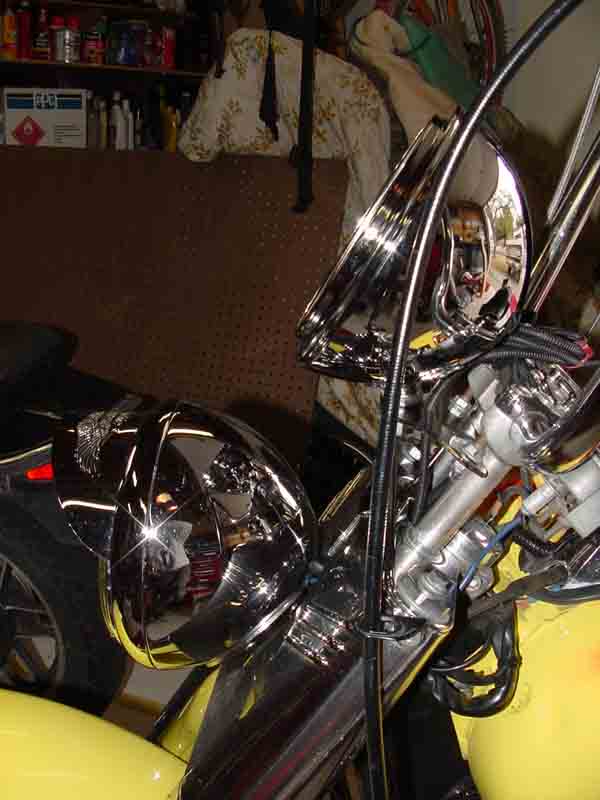
I kind of lucked out in the wiring department. My old, custom setup already had a large-guage wire running to a pair of relays inside the lower, 7" nacelle (notice 2 cube relays in the lower headlight). This wire powered these relays which, inturn, distributed power to my dual headlight setup. Here are the nacelles just prior to ripping out all the old relays and wires:
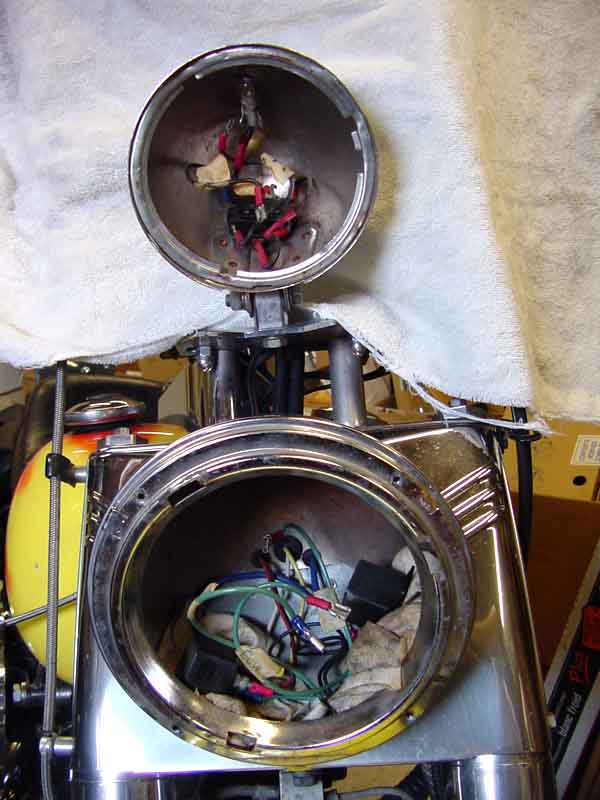
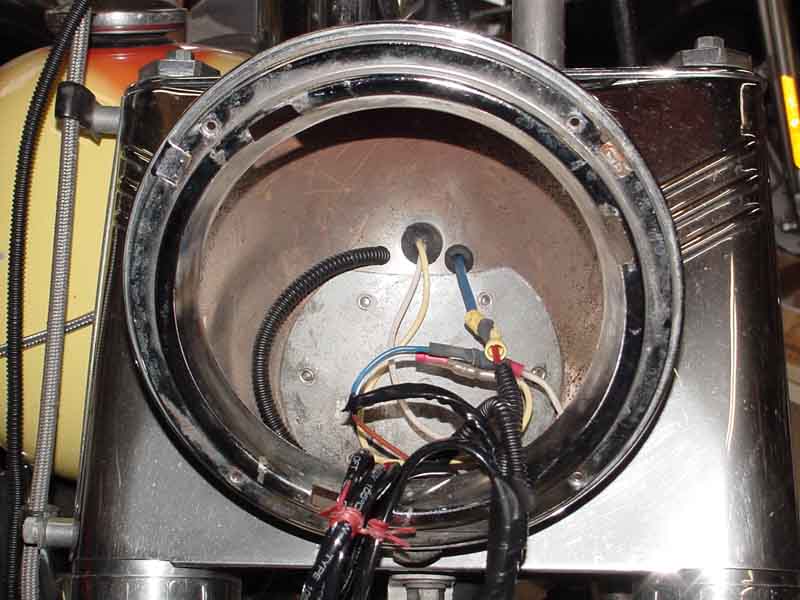
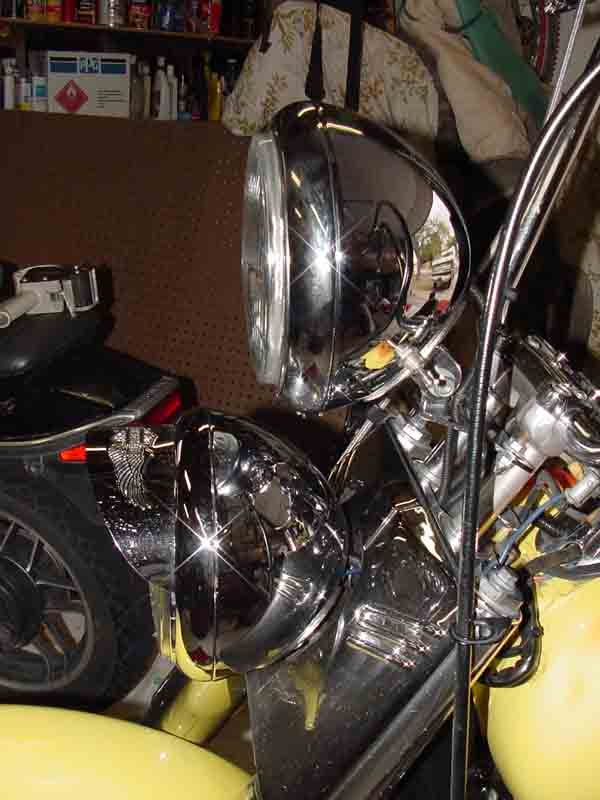
Had I started this project with a completely stock headlight setup (no relays), I would've had to run a 12 gauge power wire directly from the battery (or from a breaker or fuse bus) to the headlight. As it was, I was pretty lucky to already have a 10 gauge wire in place. Here's the nacelle after ripping out all the old, unnecessary wires and relays:
Customizing the HMI wiring harness for Carley wan't a big deal for me. I'm pretty good with electricity and wiring and have lots of prior automotive experience. Here's a picture of the newly terminated wires:
What WAS a big deal was actually fitting all this crap inside the nacelle. Placement of the ballast, solenoid control device and wires was absolutely crucial. There was no room left over for mistakes. Though the picture below looks like a nasty wiring mess, it actually all fit and works quite nicely.
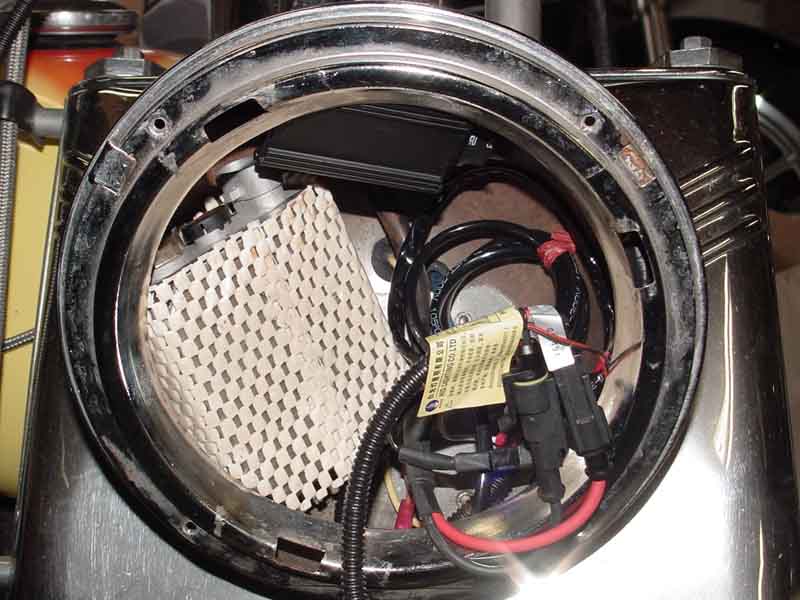
As you probably noticed, I wrapped the ballast in cheeze cloth to prevent metal-on-metal contact. The reason for this was not electrical isolation, but to shock-protect the ballast. I could just imagine being on a bumpy road and having the ballast bust right through the glass reflector. That would be bad. I actually gave the ballast a second wrap of cheeze cloth after this picture was taken.
One of the tricks I used to get the ballast to fit was to cut down the input connector. Believe it or not, the ballast wouldn't fit without doing this:
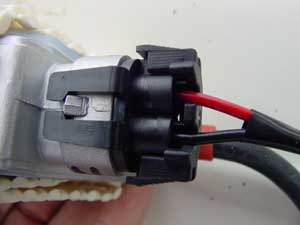
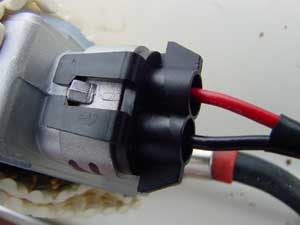

Connector
Connector minus protective clip
Connector after being snipped
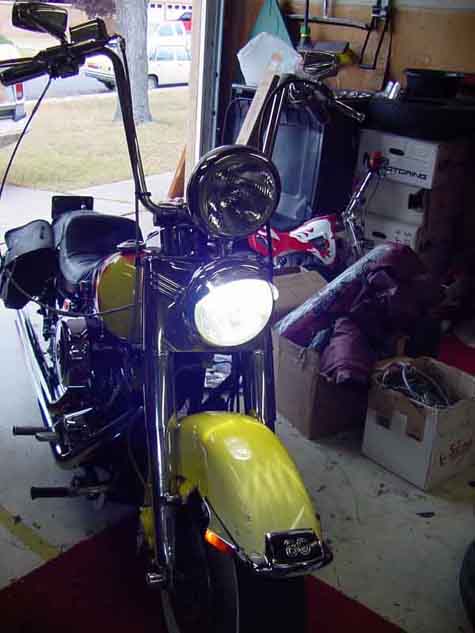
With every ounce of my being, I jammed the entire mess into the nacelle and fired her up:

Success!!
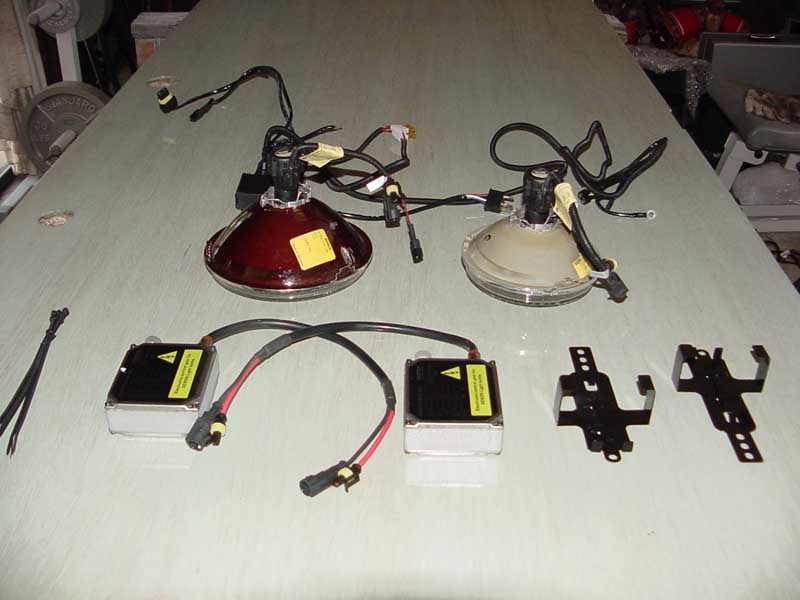
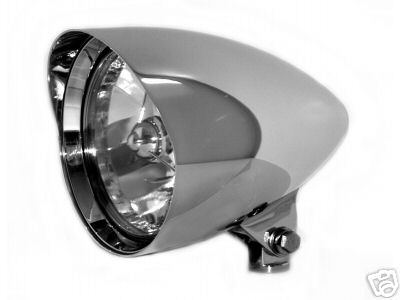
Phase II of this project was doing the same thing to the upper headlight. This was going to be even more of a challenge for the 5 3/4" nacelle. I can tell you right now that the lamp and reflector didn't even come close to fitting inside the 5 3/4" nacelle, let alone the ballast. I was going to need a larger headlight. My original plan was to try a longer headlight. I purchased a 5.75" x 7", extra long headlight on eBay for like 90 bucks. I couldn't get the ballast to fit in that, so I sent it back (at my expense, of course) and traded "up" to a 5.75" x 9" extra, extra long headlight (109 bucks...ouch!!!):
This didn't work, either. I sent this back and traded up to a more stock 7" (tall) headlight (40 bucks). Unfortunately this headlight had a mounting "head" on the bottom, which set the headlight at a precarious angle which meant it couldn't be aimed anywhere near where it needed to be:
Finally, headlight #4 was a charm. Ironically this one was purchased from an independent shop about 2 miles from my house. It was a used item, so it cost a mere 20 bucks. I spent more then that in shipping for the other 3 experimental headlights. I'm cheap by nature, so you know that "wasting money" really ate into my craw. Here's the winning headlight:
All I had to do to this headlight was mount it, route and connect the ballast and solenoid wires to the ballast and make it fit:
Getting everything to fit in this new nacelle was a little easier because there was a LOT less wiring and no control device. Here it is all wired up:
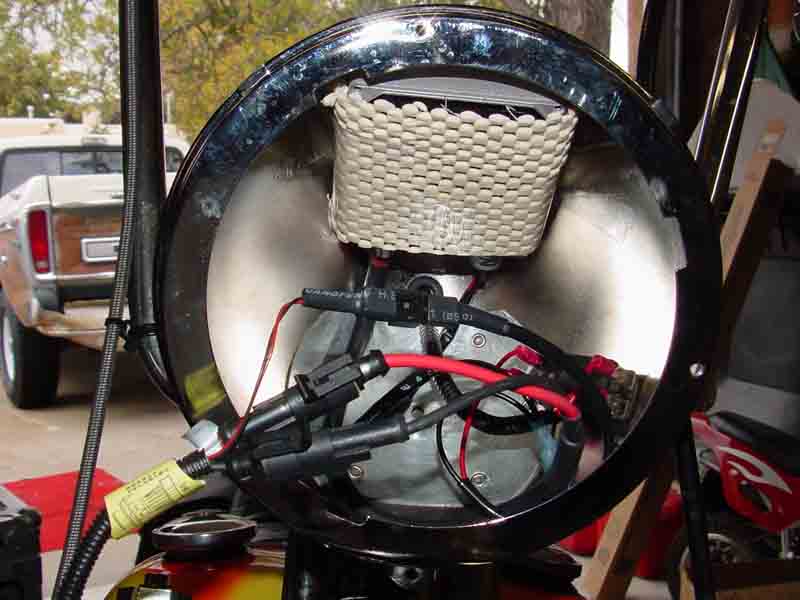
As always, I put the upper headlight on a toggle switch so I could choose to run it or not. Keep in mind that the switch interrupts power to the ballast, NOT power to the lamp. Remember that the voltage between the ballast and the lamp is very high - to the tune of thousands of volts. No toggle switch that would fit inside a headlight nacelle is rated that high. Here are the results:
Below are a couple picturs of the headlights on the road. Keep in mind a couple things:
Carley was on her sidestand, so the light is a bit scewed to the right.
This was the last dying breath of my battery and the engine was not running. Immediately after these pictures were taken I installed a new battery.
I purposely used the old, 3.6-year-old battery in this demonstration to illustrate the point that even with low voltage issues, the lights are still 3 times brighter than halogens at full voltage. The great thing about an arc (as opposed to a tungsten filament) is it doesn't get dimmer as voltage drops. Once an arc has been struck, it's either present or not. There are no subtle levels of intensity inbetween. The ballasts are regulated to take something like 9-16 volts. Once the battery voltage drops below 9 volts, the arc breaks and the light simply goes out.
These pictures were 2 second time exposures:
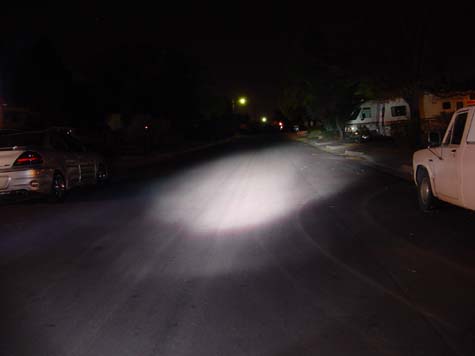
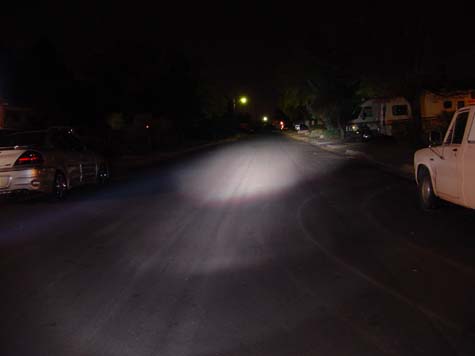
Low beam, single light
High beam, single light
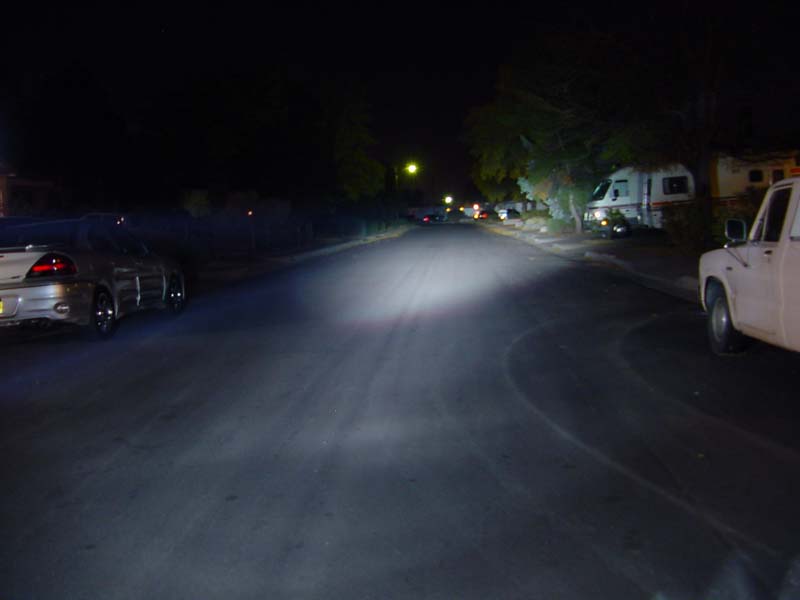
High beam, both lights
HMI spec's compared to tungsten/halogen spec's...
Though one can purchase an HMI lamp with a myriad of different color temperature variations ranging from 4300 degrees Kelvin on up to 16,000 degrees Kelvin, the most "bang for the buck" is right at the 4300K mark. HMI lamps with "hotter" temperatures gain a "bling" factor, but most certainly lose efficiency. I based my color temperature choice on intensity, not "bling." The color temperature I chose was based on the film industry standard of 4300K. At this color temperature each one of my headlights produces 3100-3200 lumens (depending who you ask). Compare that to their halogen counterpart: 1000 lumens at 3000K color temp. HMI lights have an obvious intensity advantage.
Another advantage of HMI lighting is efficiency. They are roughly 6 times more efficient than the halogen lamps. What this translates to is, though my headlights are now slightly more than 3 times brighter than they were before, they actually consume a little more than 1/2 the power. Before, with both high beams powered up, my combined headlights were producing 120 watts of heat and 2000 lumens of light. Now, though the combined high beams produce 6200 lumens of light, they only disperse 70 watts of heat (35 watts each). Less heat = less wasted energy = greater efficiency.
Another advantage, as noted above, is the HMI system's power requirement. The automotive HMI systems require only 9 volts of power to burn at full intensity. An automotive tungsten lamp becomes almost useless at 9 volts.
Another advantage is durability. Because an HMI lamp gets its light from an arc (as opposed to a piece of hot wire), it is vibration-insensitive, and therfore extremely durable. Where the average life span of a tungsten lamp is 250 hours, HID lamps last anywhere from 2500 - 3500 hours. I have seen life span specifications for HMI lights as high as 10,000 hours. This number seems a little high to me.
In conclusion, I highly recommend these HMI headlights (I have a pair on my car, too). They really light up the road. This is especially important on a motorcycle when the potential exists to hit a large animal on the open road at night. To date I haven't even come close to hitting an animal on the open road at night (knock on wood). Their little eyes shine like beacons from almost a mile away. Some say I'm lucky. I think not.
This page is up as of September 20, 2005 - 11:10 PM. Updated July 16, 2009 - 10:15 AM.
If you have any questions, comments or suggestions, please

E'mail me


Go back to "Motorcycles"
Go back to Carley's home page

All pictures & material Copyright © 2005 Donnie Frank
|

